


Scotts90
-
Posts
1,651 -
Joined
-
Last visited
-
Days Won
23
Content Type
Profiles
Forums
Events
Gallery
Blogs
Posts posted by Scotts90
-
-
I fitted a set of Wipac quadoptic standard headlamps to the farm 110 prior to its MOT due to a failed sealed beam unit. I couldn't source another sealed unit but my friendly parts supplier had a set in stock at a great price. Checked the voltage at the multiplug prior to changing and was getting a good 13v with the engine running....fitted the new ones (had osram night breakers fitted too) and wow what a difference! It's very rarely used for any great distances in the dark so the lights had never been an issue.
I was contemplating the bling LED units for my own 90 but just ordered some new quadoptics instead. (That's a few hundred quid towards the winch! Lol)
-
I found toolstation to be even cheaper than screwfix for bulk packs of of 8.8 nuts/bolts and washers. They tend to have a better selection too. The stainless vs bzp issue I researched at great detail...if the original bolts lasted almost 30yrs with no cleaning or wax protection/greasing then I hope the new ones will last the same!
For critical bolts such as suspension/braking and transmission I sourced the OE bolts from my local 4x4 specialist.
-
I ran my original loom through the new galv chassis as it was in remarkably good nick, however a change of tack and a full td5 loom install and with some advice from those on here I have run the td5 chassis loom on the top rail. As mentioned previously it makes adding or future fault finding a lot easier.
I did remove the tdi loom and although I had meticulously wrapped it up in loom tape it was torn to shreds by the innards of the chassis, I can only speculate that the galv inside was to blame. I'm pretty glad I changed as I reckon it would've shorted out given time.
-
I am considering these on my 90. It's not to everyone's taste and is definitely on the bling side of things but I think it suits the defender. Masai also do the kit as fitted to the Nene Overland defenders (again, not everyone's cup of tea).
-
Wow, that's a tidy set up! ^^
-
Not difficult at all.
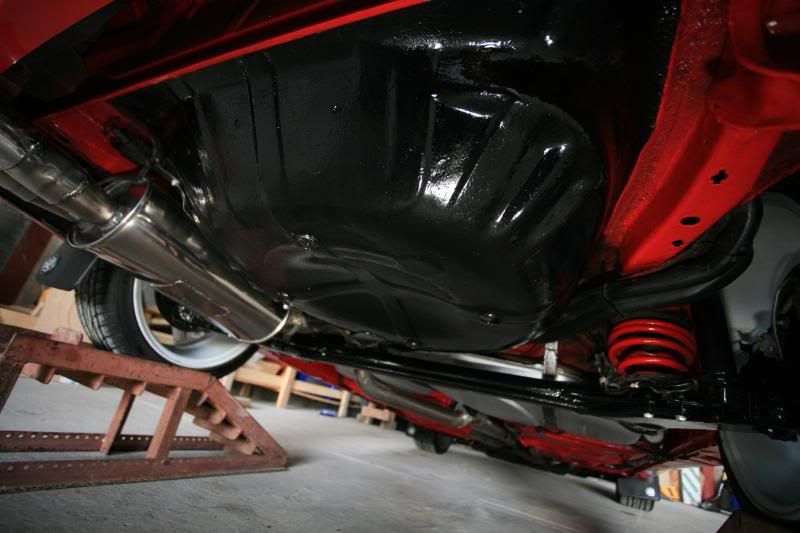
My 90 has been Waxoyled for 15-years now (with occasional re-applications) and the muck practically falls off. I pride myself if keeping the underside clean (no pressure washer required, just regular cleaning with a hose-pipe) so rot never has a chance to take hold. The Army were good at teaching how to get into ALL the nooks & crannies which also makes the vehicle more pleasent to work on. Come MOT time there is always a comment along the lines of how nice it is to check a vehicle where you don't get muck falling in your face all the time.
This is how I clean I like mine...sad but hey-ho. Never had any problems selling cars on when they're kept like this tho
My astra gsi
Vectra gsi

Mk3 astra gsi
Yes, I like my vauxhalls too lol
At MOT time the testers put rags on the beam jack so as not to damage the paint.
Back on topic though, on one of the rally are we built the Kevlar guards were only lasting a couple of events before thinning through so we used curved section from blue chemical barrels to form inner arch guards and deflectors. Those worked a treat
-
My main dislike about waxoyl and similar non-setting coatings is their limited scope for cleaning. I like to be able to wash/scrub all the crud from the inner arches and underside and whilst not impossible with waxoyl it's a lot easier with a hardened finish
-
Raptor coat sounds good. Thanks for the ideas chaps

-
Has anyone stone guarded the underside of their tub? More specifically the inner arches?
I'm aware the tub is almost all alloy/aluminium and factory spec appears to be the lightest dusting of paint known to man, just wondered if it's worth the effort to try and add a layer of sound deadening and a little added weather protection.
The plan is to etch prime all the bare areas then seam seal and prime as usual. Do I topcoat then waxoyl, or schutz/gravitex then topcoat.
The bad point is creating a water trap if the stoneguard gets breached.
Any advice or experience appreciated
Scott
-
My 87 had the lift up handle doors, judging by the pictures these have been swapped from the push button type. My OE ones had the burst proof striker fitted as opposed to the standard type as shown in your image. I know you can spec replacement lift up doors with locks suitable for the standard push button strikers.
-
Disco tdv6? Depends how deep your pockets are. It's euro4 spec iirc
-
Well, I like the way it looks too. As for "jeep", was it not a slang term for general purpose coined by the military ? No vehicle fits the role better than a defender. It's a pity the decal on the door isn't clearer or it may have helped trace the modifier/garage.
-
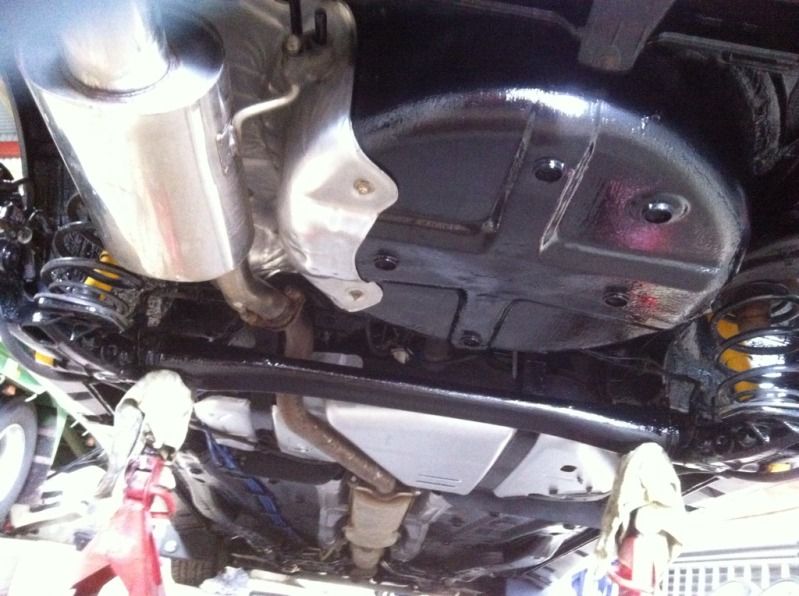
Hi guys, due to being on call I thought I'd tackle a nice easy job...fitting the exhaust. I have a 200 tdi and was going to fit the late 300 tdi centre and rear pipe, altering the down pipe to suit so the rest of the system was standard 90 300 items.
As always it's never straight forward. I had purchased the chassis mount, mid cross member and rear mount for the 300tdi system from YRM. The reason for the 300 system is due to the rear mounted td5 tank. With the centre and rear fitted the centre silencer is almost touching the a-frame arm brackets and the rear pipe is only 5mm from the arm itself. Is this normal? At the gearbox end of the silencer there is no way the front pipe is going to clear the gearbox mount. It's an allmakes system, not a britpart...surely the tolerances aren't that far out....lol
Now I do have a 200 front and centre section and this fits with no fouling or clearance issues, I did cut it short at the rear small box so as not to foul the tank when mocking it up. Is there much difference between a td5 and a 300 system? I know the mid crossmember bracket is to the rear rather than slung under neath
My chassis is a Marsland galv item and it has the td5 style welded a-frame brackets, I assume it's more "td5" than 200 chassis, it just has the gearbox/engine and side tank mounts fitted to suit.
My aim was to make it as standard-ish as possible but it looks like that theory is out the window, anyone else had these problems?
-
Can you find the moulded plug with the corresponding colours feeding into the dash loom? The colours mentioned are for the instrument panel. I think the white/purple is the interior light feed on earlier models.
-
Which model/year? Green/black fuel gauge, white/slate low fuel I think
-
I am converting from lift up handle style doors to td5 push button doors and I'm wondering if anyone knows if the two uppermost holes from the lift up striker are in the correct place for the newer style strikers ?
My tub and doors are a long way off from being fitted but I'd like to get the holes drilled through the new repair panels prior to any paintwork.
I have the newer style strikers and rear plates ready to fit....just need to know where
Cheers
Scott
-
The holes are for the side markers fitted to the NAS model, undecided whether to fit LED markers in there or cover them with the chequer plate
-
The metal version, will stick more pics on the build thread
I'll cut the filler opening tomorrow
-
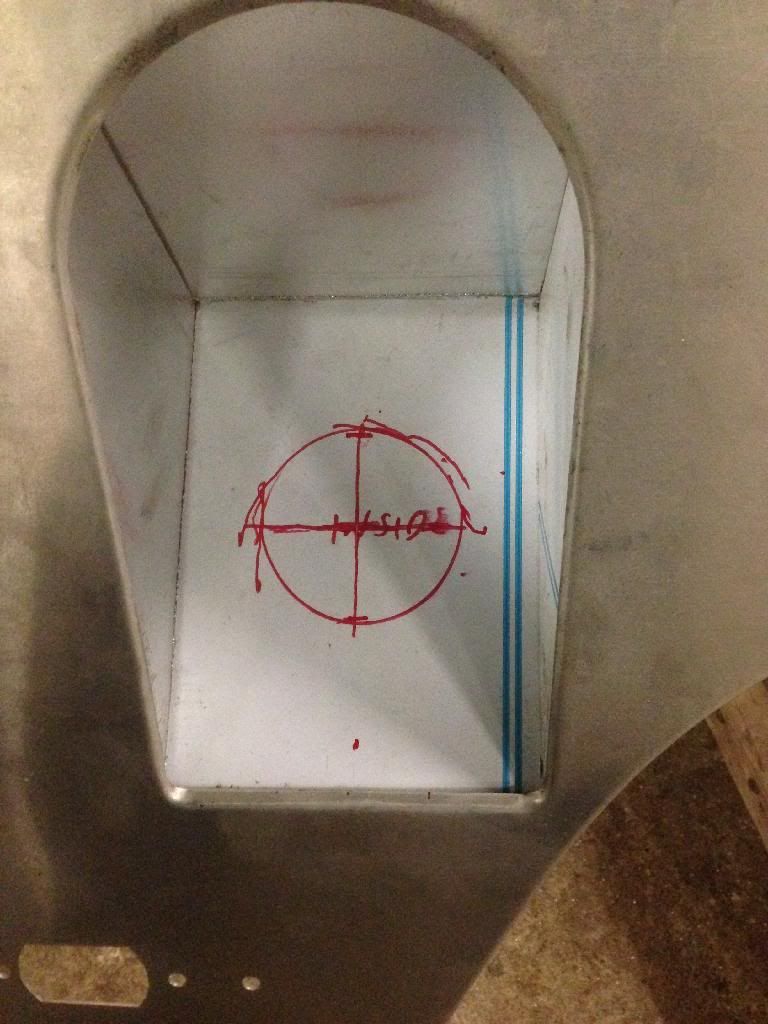
Thanks to the supplied pics I managed to knock up a mount in best blue peter fashion. Cardboard mock up to begin with
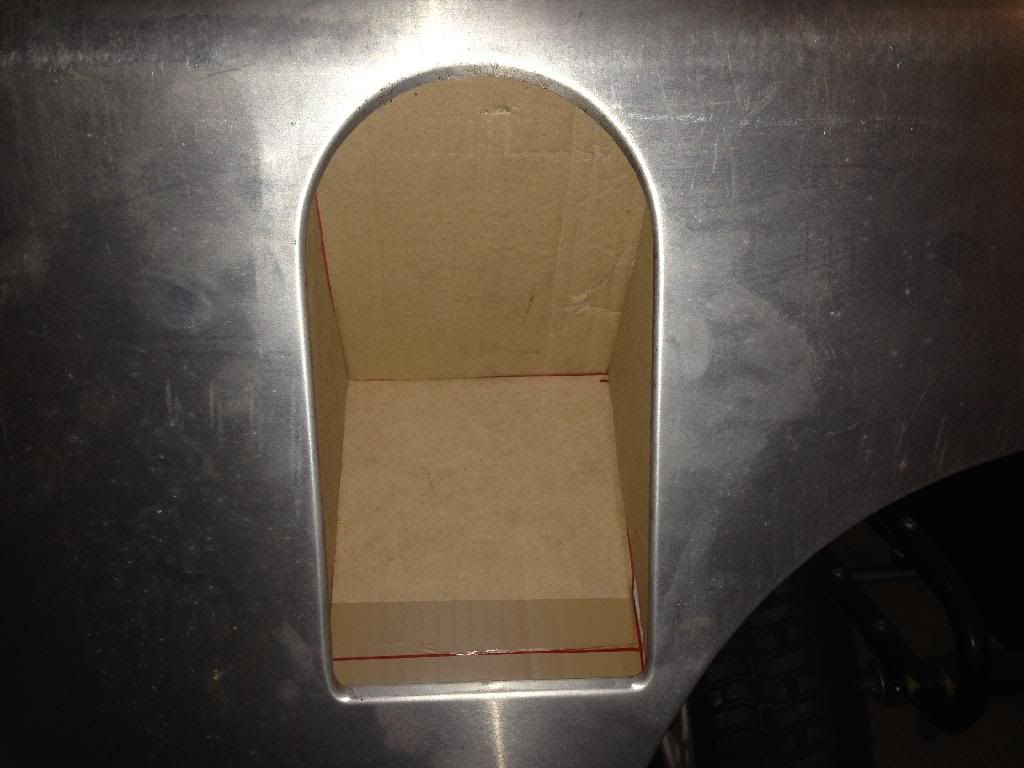
And once my dire upload speed transfers the rest of the pics up I'll show the metal version
Cheers again Western
-
Those pics are exactly what I needed. Thanks very much!
-
Yes it's worth a try. It's the roof of the housing that I'm more interested in. Is it arc'd to follow the opening or just flat across the top?
-
Hi guys, got a request for some decent pics of a td5 90 fuel filler neck panel. I have NAS quarters to fit on my tub which ties in with the relocation and fitment of the td5 tank. I need to fabricate the filler neck mount, the lower and side panels look pretty straight forward but I need to see the top part to see if its curved or just flat...a google image search doesn't show any great detail.
I do have the filler neck and also have a 130/hi-cap plastic filler (this screws on to the outside of the quarter but is no good on the 90 as the aperture is too close to the wheel arch.
Any help appreciated
Scott
-
My 06 td5 XS loom was factory fitted for a 2 tab screen and the HFS relay was melting at the terminals due to current draw. My new screen is a 3 tab and I've split the load and feeds over 2 relays. Can't see an issue leaving the unused feed suitably insulated and tucked away for future use...but I'd keep an eye on the relay for signs of overheating.
-
If you haven't already, have a look at Retroanaconda's guide to installing a TD5 instrument pack in an older vehicle (the sissy's version of what you're doing
 ). From looking at his schematic, it appears that the speedo transducer is directly plugged into the rear instrument pack? Difflock switch is a simple circuit, ditto reverse light, so you should be able to make up simple "transmission loom" yourself. That's my plan anyway, but I'm taking the sissy route.... Matt
If all else fails the sissy route will happen. Logic would dictate it should be on the chassis loom, or at least the main bulkhead loom but after asking Les he has confirmed these switches are fed from the engine harness. I'm sure when they designed the td5 looms they didn't anticipate them being retrofitted to 27yr old defenders. More looms are in the post....yay!
 ). From looking at his schematic, it appears that the speedo transducer is directly plugged into the rear instrument pack? Difflock switch is a simple circuit, ditto reverse light, so you should be able to make up simple "transmission loom" yourself. That's my plan anyway, but I'm taking the sissy route.... Matt
nut &bolt set
in Defender Forum (1983 - 2016)
Posted
Looking into the chemistry of disimilar metals, I found that the advice was to stay away from copper (albeit suspended in grease) when using in connection with aluminium or galvanised steel as the further the metals are apart the faster the corrosion process occurs. I have a zinc-oxide based anti seize compound that I plan to use where the bzp fittings are fixed to the alloy panels. My chassis bolts are all dry fitted against as there are no disimilar metals as I have galvanised brackets throughout.
The compound is primarily for the marine industry but it's worth a try. As I said, the original bolts I assume we're fitted dry and although they corroded the bolts were still holding together after 25years of neglect.