


minivin
-
Posts
2,121 -
Joined
-
Last visited
Content Type
Profiles
Forums
Events
Gallery
Blogs
Posts posted by minivin
-
-
Cheers Andy, that would be most appreciated

-
Propshaft Clinic made me a 4" slip joint with wide angle yokes when I fitted T I Console para's to my 109FFR (this has a 1Ton chassis with extended shackles already, adding to the problem).
Just the extra slip joint length on a standard length prop solved my issues.
-
-
Ah kay, been an interesting day, I have contacted both P A Blanchards and Duxford who list in their spares that they have the spring compression tool, but alas they don't. I have also gone to Land Rover direct through my offical spares dealer and they have not done tools in years and have sub contracted it to SPX. Now unfortunately SPX do not have a cross-reference chart for old vehicles and only "really" specialise in the modern Land Rovers......
So alas, this tool has become an item that no one does/will/want to stock.
Does anyone have one of these tools that they would be willing for me to borrow to take dimensions off so that I can produce my own tool? I do have access to a loose steering relay, but would rather copy an original tool.
-
I remember driving an Army V8 110 in my youth. I was very dissapointed with it's performance considering it was a V8. It just didn't seem to rev above a certain limit. I seem to remember someone said that the Army fitted restricters to the carbs to stop enthusiastic driving. Quite what the restrictors were I do not know but, it's worth a look.
HTH
Ivan
Possibly fitted with one of these:
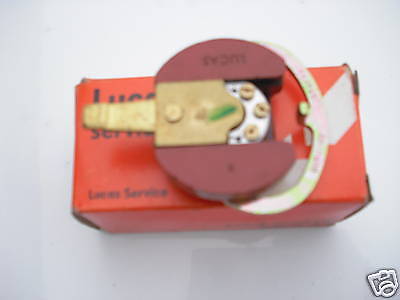 Speed limiting rotor arm. Made by Lucas part No 54424875
 -
I've had a look at both Goodrich and Earles and unfortunately after some time searching through lots of their braided hosing I gave up.
However, two success stories, BeamendsLRS supply stainless 3/8 UNF, 7/16 UNF and M10 stainless on certain items. While Stainless parts can supply as stated in an email:
"The 3/16 i/d Stainless Steel Brake Unions on the website is the INTERNAL DIAMETER. the threads (UNF) are actually 3/8 UNF. We do have in line bulkhead fittings for the 3/16 i/d x 3/8UNF. the only 7/16 fittings we have are in brass.
I hope this helps"
http://www.beamends-lrspares.co.uk/BeamEnd...akes/index.html
http://www.stainlessparts.co.uk/product/view/-/productId/47
Getting there, but not all the bits I need!
-
Thank you gentleman, I'll give your recommendations a try!
Rob Vincent
-
Isn't Goggle a brilliant resource, well actually it isn't, most of the time it finds worthless Ebay links and general rubbish that equates nothing to what you put into the search field.
Well, simply put I have been searching for much time now to find a supplier of stainless steel brake unions so that when I rebuild my 101 I don't have rusty nuts for when the inevitable replacing of the slave cylinders et cetera happen.
I believe Mr. Barton on here used to supply them but no longer does. Can any one point me in the right direction?.
-
That sounds like the dog gear out the equation. Worth pulling the PTO cover for the cost of two gaskets to make sure the output gear aint come loose
-
i) Take the PTO cover off and check the output gear is ok on the mainshaft splines.
ii) While the PTO cover is off, worth pulling the gear out and seeing if the mainshaft can be moved, if so, the mainshaft bearings may have let go.
iii) ummmm...... drop the oils in the gearbox and transferbox and see if anything comes out! Just remembered the dog gear on the output shaft of the transfer box, the gear that goes back and forth to engage high or low ratio, has a very crude teeth arrangement that can wear with time and result in total failure. Engage low ratio and see if the vehicle moves.
Clutch-wise, if you can engage gears, I'd go away from clutch failure at this moment.
-
I had looked into the option of removing the standard air filter mount in a series and locating it there, however if your willing to do some chopping to the facier you could mount it within on the port side and run the pipes ah la defender.
I got an alloy oil cooler and mounted inside the from facier as follows:

Corr that was a few years ago now
-
Aiy, same basis as what we have fitted to class 158 and 159 diesel trains on South West Trains. Our one's which are much larger have an external water pump. There are two thermo-couples inside the unit to measure the water temperature, it cuts the unit once it gets to a certain temperature, the second is a fail safe to prevent over heating. Yes it will sound like a turbine as it will more than likely have a coaxial motor with an impelor to draw air in, blow it past the burner head and then down the burner chamber and back down the exhaust.
Watch the exhaust, they get bloody hot. The fuel jet mounts on certain models have a plastic body, BE WARE IF IT IS PLASTIC. They just supplied a whole load of new complete assemblies to us and they have been leaking like hell and when you have lots of diesel being sprayed around a naked flame, well, the Red Arrows aint got ****ing anything on us, we can fill a three road train shed in not much time with white smoke
 . Also the flame tube can crack, so worth checking.
Other than that, pretty much bullit proof and I must get around to rebuilding my Eber' for the 101FC

-
aiy, has already been discussed on the 101FCC&R. pretty much means chopping chassis around, changing steering arms on steering swivels et cetera. better to find someone who wants the opposite and swapping vehicles.
-
As above, need to get the alloys on my other car refurbished in gloss black - had two quotes for the work, both were £200 but one was with a powder coaters and one with a body shop (cars, not smellie girlie stuff)
so, which is best and why?

Depends on the quality, there's one in Salisbury who'd do the same for £150 powder coated. He does the best in the area which doesn't chip off (my 109 chassis is powder coated by him, it's got scratches through the powder from three years ago and it still hasn't rotted off like most people threat about), but it's down to the preparation, heating, application and curing that gives the result, any short cuts results in a **** finish.
-
Rob,
You need to change the master cylinder for a 110 one as they're biased more towards the front which will solve your problem. The series dual cicuit one is split 50/50, where the 110 one is 60/40 (ish cant remember exactly) which will solve this problem.
I'm running disks all round on my 88" and with the series master find its about right. Running my own home made disk conversion on the front and range rover based rears.
The zeus disk brake kit is horrible. Tonk bought one and sent it back to them and then we made out own. The heystee/TI console one isnt much better either!
Sliding calipers on an off roader is a disaster IMHO as they just jam up having filled up with mud!
Jon
Hi Jon
Yeah I suppose I should fit one, maybe in a years time or so once I've got some mileage under the belt of the genuine master cylinder that cost me a small fortune

-
Excellent piccie's, was hoping to do those tracks this year, but broken gearbox till July put paid to that
 maybe next year, if I don't buy a house
 -
I'd recommend only doing a disc brake conversion on the front and just fitting new cylinders and shoes in the rear. My 109 is running a disc brake conversion on the front with new shoes and cylinders on the back and I lock the rear wheels before the fronts. Discs on the back would just exacerbate the problem unless you went down the route of apportioning valves et cetera.
-
Can't say I've had issues with mine, came from Ashcrofts but is the bearmach kit. I do get vibes at ~80mph but I think that's due to the fact the props are doing silly rpm by that point thanks to my gearing.
Edit to add: Your kit does look better though Rob, the BM kit is disappointing for the money. And a good writeup to boot

Cheers John! I forget how much I paid, but it was certainly only worth it for the shadow gear, that seems to be the best part of the kit....... and that's saying something when even that item is a rough sand cast item!
-
Cool! Mine is SORN now as it needs work!!!
It needs work????? You aint done enough mileage to need it

-
Rob,
So would you advise against buying the bearmach kit??
I ask as I'm running mine in permanent 4wd at the moment and I've been toying with buying the part time kit. Frankly mine doesnt kick back through the steering too badly (only really when on full lock) so I'm not entirely sure its worth bothering with.
Jon
I have to say Jon, that the kit is not worth spending th money on as it is not up to the job particularly in a Series application where the front propshaft is much longer than standard. If your thinking of going 2WD with selectable 4WD, let us know and I'll try and assist you with the info on how to go about it.
Rob
-
No, sell it to me!
Well, if you had room in your garage I could possibly offer to have it in your garage....... with a 101 outside
-
I've had a few questions about the R380 in the series, so I have just re-instigated all the pictures that I could find

-
To follow on from my problems with the Bearmach kit in the below link, I have now redesigned and had made the bits to solve my problems:
http://forums.lr4x4.com/index.php?showtopic=25087&hl=
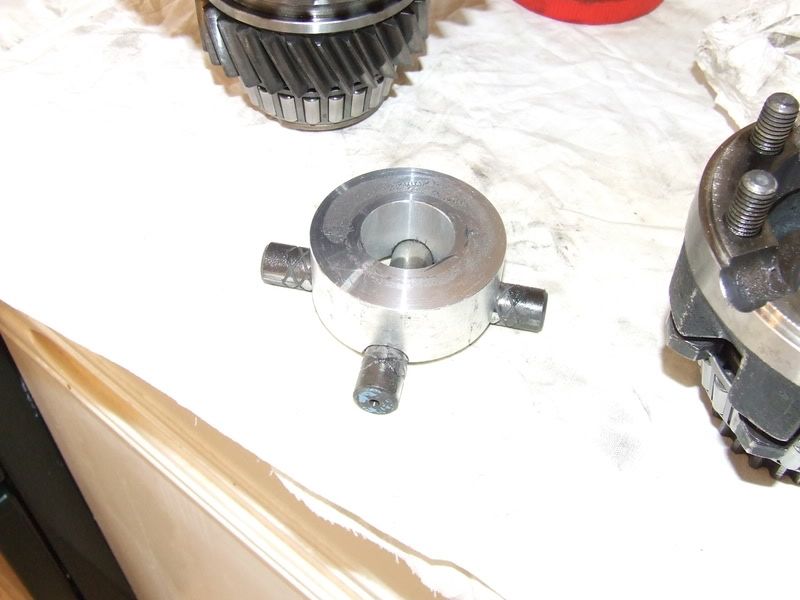
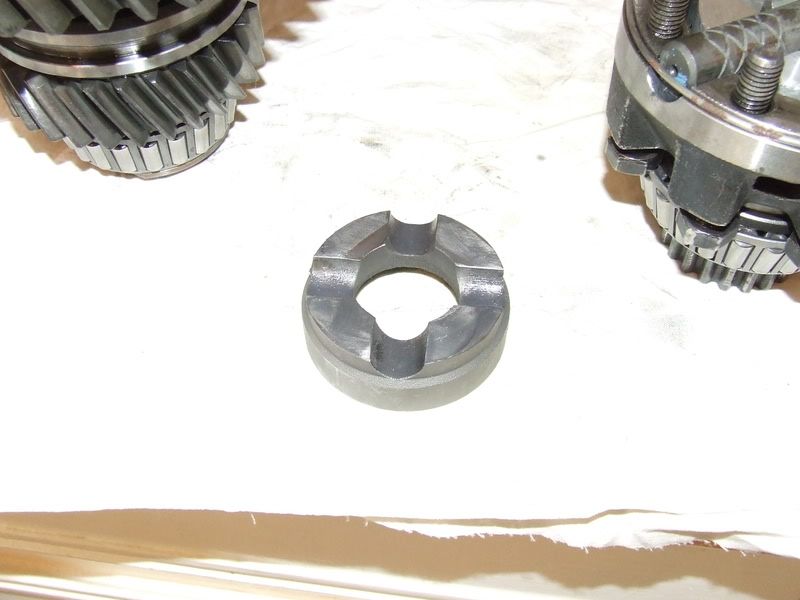
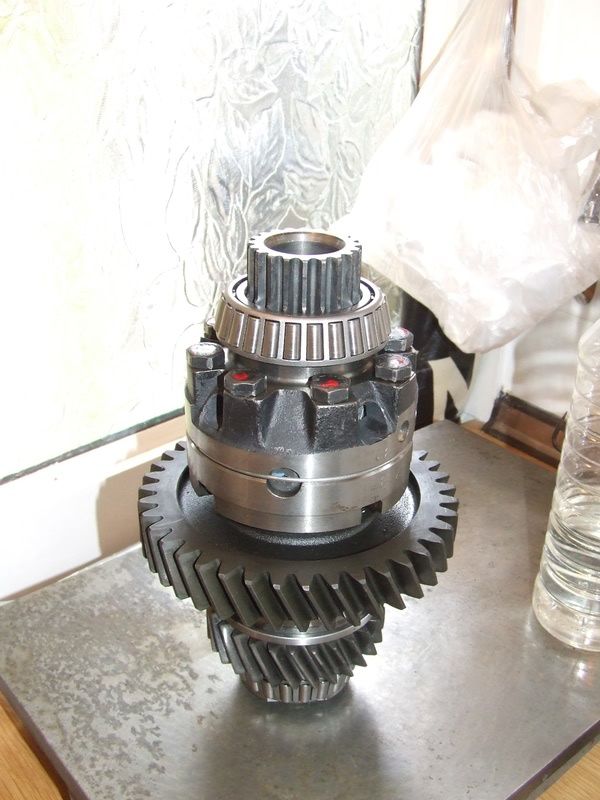
I have now had the parts machined, involving having made an alloy spacer, two thrust washers and having the original "inner race" machined down to fit inside of the centre diff outer housing.
With the parts now here (I'll just note now that the outer housing had the bottom machined to remove a chamfer, and now has a flat region for the bottom thrust washer to sit on!), I inserted the first thrust washer, the inner race and then the top thrust washer as follows:
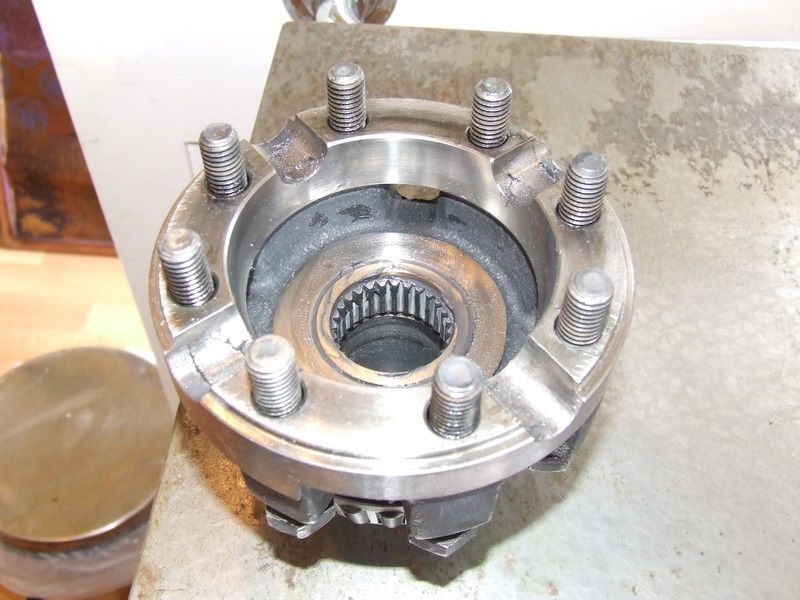
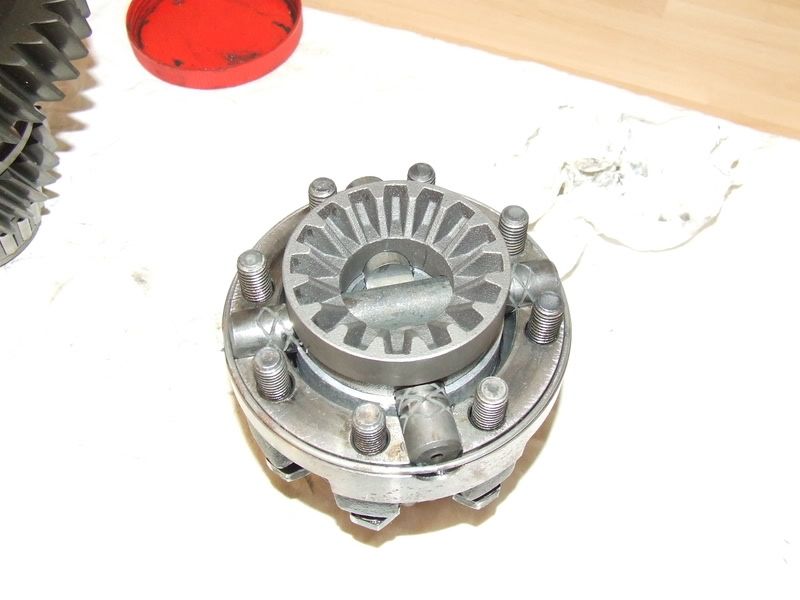
The spider was then placed into the alloy spacer, this was done to locate the race and thrust washers so that they could not move out of the outer housing in service:
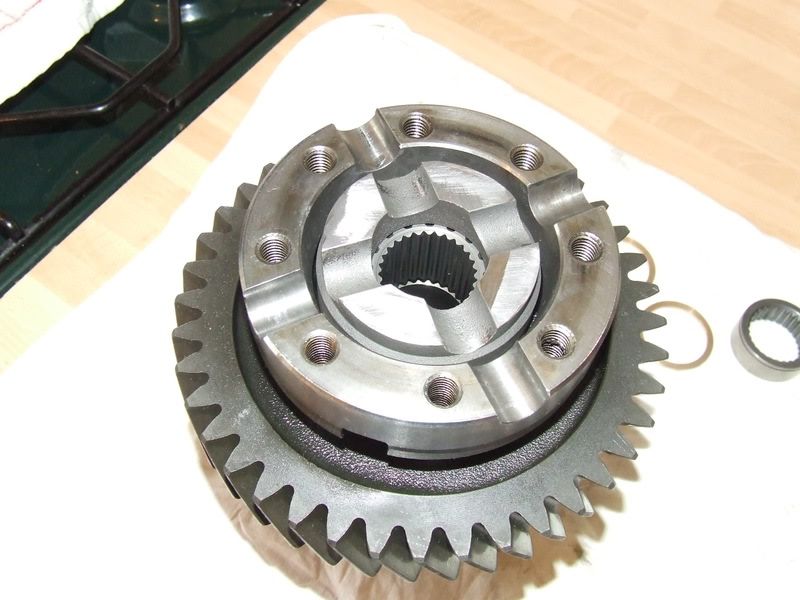
I then had a slight hiccup! the main diff housing has a sun gear fitted inside that then normally has the planetary gears work against it by their location on the spider. With the Bearmach kit, these planetary gears are ditched and a shadow gear is fitted and locks the sun gear to the diff housing. This locking is provided by the shadow gear being retained by the spiders locating into it, however what I didn't twig at the time was that the rounded recesses for the spider where not a 180^o recess, but a very deep recess that impinged on the area where my new alloy spacer would be!. After some swearing I took to it with a slitting disc in the angle grinder, having marked the cutting point on my surface table, and got the following finished parts for the main housing area:
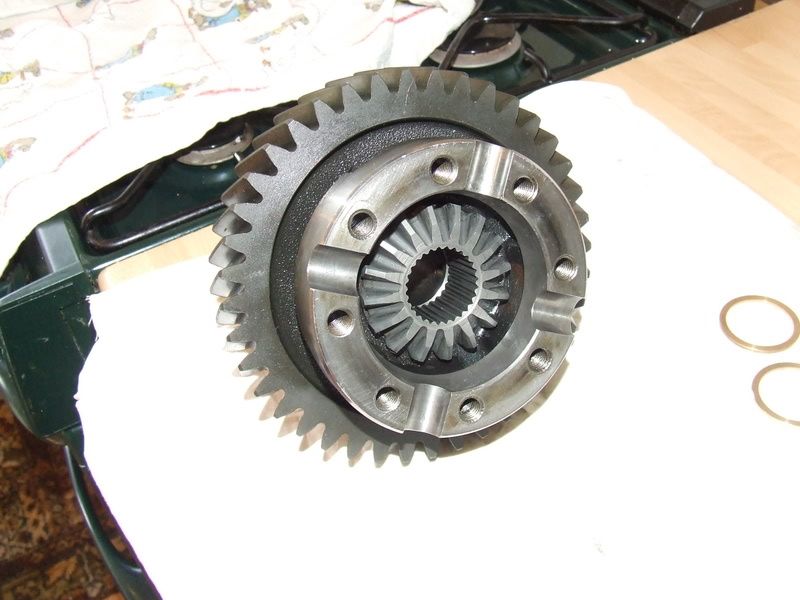
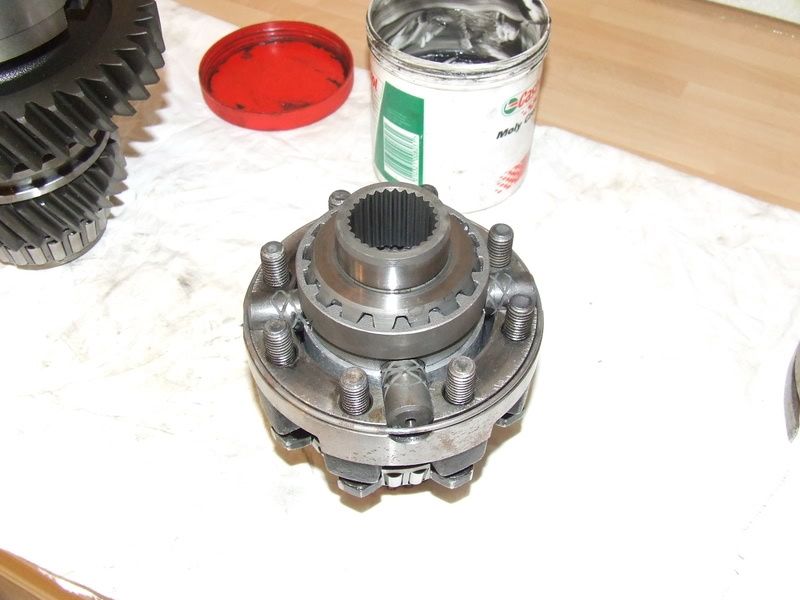
Now, what else could go wrong.... luckily nothing else! the alloy spacer, spider and shadow gear were fitted, followed by the sun gear, and the main housing offered down onto the front housing assembly, and the retaining bolts done up and torqued to provide the resulting centre diff:
I have been running the vehicle over the past week and a half, having covered over 100 miles and can happily say that my front prop vibrations have now disappeared and it is running a treat.
Modifications to the idea..... I am thinking of buying another centre diff at some point and rather than modifying the Bearmach items, I would machine down the front sun gear to remove its gear portion and once again have either an alloy or steel spacer to locate it, so as to provide the free-wheeling front output, and then coming up with another method of locking the rear output sun gear. However that project can wait as the 101 needs some time spent on it
-
Aiy, it's been causing me a few problems for weeks. Think they have got a little too big for their own benefit!
Aint tried any others unfortunately........
 . Also the flame tube can crack, so worth checking.

 maybe next year, if I don't buy a house
600536 Steering Relay Compression Tool
in Tools and Fabrication
Posted
Much appreciated sir