


robp
-
Posts
20 -
Joined
-
Last visited
Content Type
Profiles
Forums
Events
Gallery
Blogs
Posts posted by robp
-
-
You can't use the double female adapter easily because the correct set of hoses takes a clip that locks the end into the panel. It wouldn't want to be flapping about

But this is of no worry at all, as the male hose you have has nuts on the end, so the hose goes through a plate or panel that way. All you need are washers to make the big hole small

But are they imperial vs metric? Don't know meself on that one? New fangled metric stuff is confusing, as its so close in look.
Easy life: Put the new ones for sale on here, buy the right ones?
Cheers for the reply, much appreciated
I had worked out the bit for the fixing onto the inner wing using the supplied nut.
They are metric fittings so I think I am going to use them. I have the kit to make up new copper pipes if needed so I suppose if I have to replace all the 20 year old pipes with fresh stuff it wont be a bad thing anyway
Rob
-
So I picked up a bargain set of +2 braided hoses at Newbury yesterday.
I got the 5 hose set as I knew the front calipers on my non ABS 93 disco had two hoses each and the fifth is the single rear hose.
Once I got home I found that there is another version of the 5 hose set up that has flexi hoses with double female ends (http://www.ebay.co.uk/itm/Land-Rover-Discovery-1-150mm-Braided-Brake-Hose-Kit-/230606610756?pt=UK_CarsParts_Vehicles_CarParts_SM&hash=item35b139a144'>THIS is the correct set) for each of the fronts but the set I got is pre 92 with double male ends.(http://www.ebay.co.uk/itm/Land-Rover-Discovery-1-150mm-Braided-Brake-Hose-Kit-/220766112220?pt=UK_CarsParts_Vehicles_CarParts_SM&hash=item3366af89dc'>THIS is what i got)
Can I use one of http://www.ebay.co.uk/itm/2-way-female-brake-pipe-connector-universal-fittings-/290136402623?pt=UK_CarsParts_Vehicles_CarParts_SM&hash=item438d7a2abf'>THESE double female connectors to join the flexi hose to the pipe on the inner wing?
I will be replacing the short bit of pipes from the flexi to the caliper so can make that up with the correct fitting to suit
Anyone have any advice? -
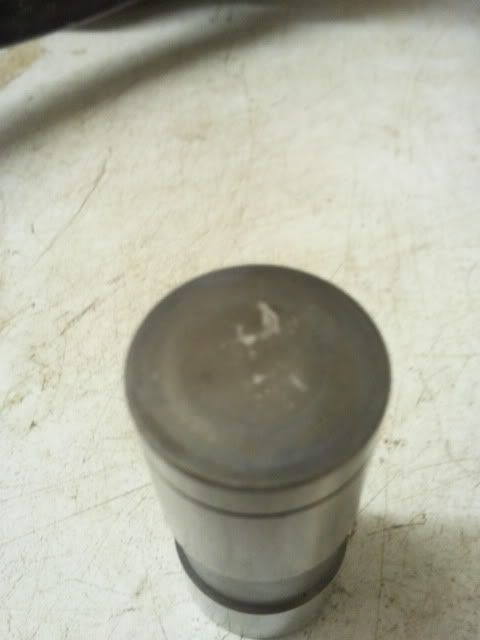
What tappets did you use for the rebuild?
This sounds identical to the problem I had. Replaced cam ,tappets, timing chain etc. Britpart kit.
At first it felt like a different engine, but within 500 miles I had a really bad tapping back on one tappet.
Took the rocker covers off and checked the push rods for excess movement. Found one was really loose.
Stripped the top end back down and found this
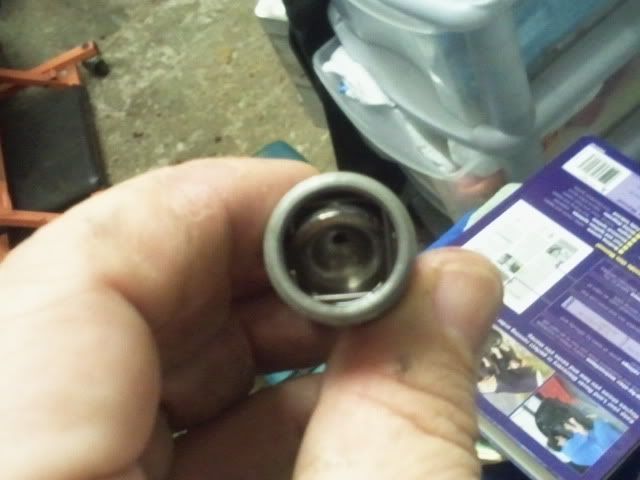
the cup in the tappet had spun round causing damage to the cam, push rod, and rocker cup with it all rattling around.
Second rebuild in 500 miles, this time using OEM tappets and another new cam
Having said all that when I watched your video it does look very dry in there. Check the rocker oil ways aren't blocked if you are sure they are mounted correctly
-
Will be going up to this on Sunday.
-
Yes I have done it to my 8" spots mounted on the bullbar.
THIS type, fitted a 50w 4300k kit from THIS seller on ebay
Mounted the ballast behind grill and the only mod I had to do was enlarge the cable entry on the back of the lamp body for the plugs. Just fitted a larger gromit to seal the larger entry hole. The bulb is a straight swap
I know halogen lamps are not designed for HID light pattern but I only use these lamps off road and the difference in light output between a 50w hid and the original 100w halogens is incredible!
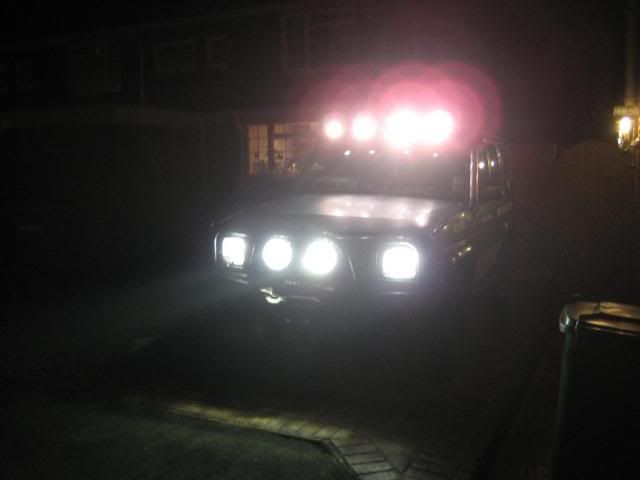
Headlamps 35w H4 hi/lo HID
Spots 50w H1 HID
Roof lights 55w H7 halogen
-
Good result there Sam, glad you finally have a working tacho
I know it might seem a big mark up for those few components but the way I look at it you are also paying for the research that has gone into solving the issue and producing a working solution you can easily plug in.
PS where are the off road pics?? did I miss a page

-
Ok so I need to call on someone with the tecknikal info here!
Is the output from the ECU similar or distinctly dissimilar from a coil negative?
I thought coil negative was positive with a negative pulse? Or is it the other way round?
Basically why night this counter not be working??
Help would be appreciated before I start ripping the dash apart again!!

Sam
Is THIS any help
-
Excellent work there fella.Great attention to the detail
Those headers give such a wonderful noise too
-
Is this any good to you? Not sure if you want 3 or 5 door
-
Did this to my poverty spec 93 disco when I first got it.
The full wiring loom was present. Just swaped the regulators in the doors, plugged the switch panel in and fitted a fuse in the correct slot.
-
you won't find part number in rave, cos it's the workshop manuals,
see item 5 [lots of them] in http://www.numcat.ru...ver/p/32/45292/
Excellent, thanks for that much appreciated, I did mean to say I had searched microcat not rave but cheers anyway
-
Can anyone supply the part numbers for the o/s and n/s front wing top rails as per THIS ebay listing?
Tried rave but can't find it
-
Hi all,
well I've managed to open the Rave pdf from the tech archive.
The lx diagrams are just what I was hoping for. Much more detail and have helped me make a bit of sense of my problem.
The under bonnet feed to Sat2 fuse box has a splice on it, (splice 226) as soon as I get a chance I will try and track it down
Andy,
Splice 226 will be located under dashboard area. So would suggest looking behind fuse boxes. The splice numbering system in the diagrams indicate what area the splice is located in.
100's under bonnet
200's dashboard
300's front seat area etc
-
Thanks guys, I had started downloading them, I need to go and get some blank CD's to burn them on so I can see them....
Andy
If you tell me what circuits you want I can open them in my copy of RAVE and do copies for you.
Rob
-
Heres mine in my 3dr Disco
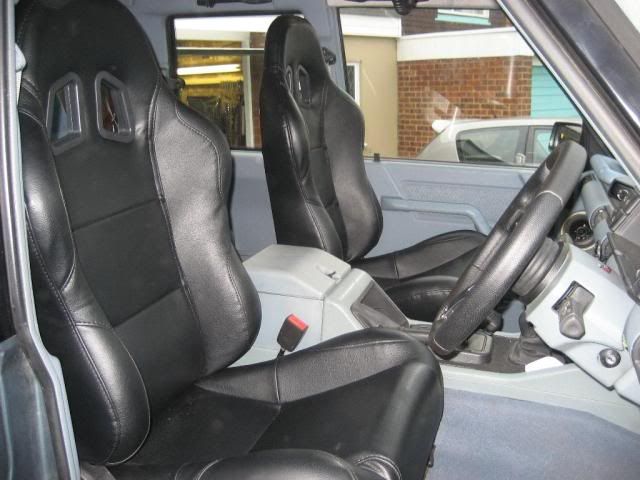
Used the original LR tilt subframe and fitted two 60mm x 6mm (i think) bars on the frnt and rear mount of the subframe then bolted the seat onto them as the seats runners are slightly wider than the originals.
Result = two vinyl reclining bucket style seats that stll use the origial tilt forward mech for access.
-
Not sure where the tune resistor is situated on the range rover loom but on the disco there is a two wire plug exiting the loom just before the ecu.
I was suffering exactly the same problems on my v8 disco as one of the lambdas was knackered.
The original cat tune is I believe 2300 ohm (not sure if that the correct spelling!) I replaced it with a 470ohm 1w resistor costing 15p from maplins as this is the non cat tune version. Result....ecu no longer looks for lambdas and it runs a whole lot smoother. Got to be worth 15p to try it.
Rob

what mig welder to get?
in International Forum
Posted
I have the Clarke 160TM. I got that after loads of research on mig-weldng.co.uk to replace my crappy SIP
Very pleased with it