


zulublue
-
Posts
328 -
Joined
-
Last visited
Content Type
Profiles
Forums
Events
Gallery
Blogs
Posts posted by zulublue
-
-
Can you join in at any point? as there is no Midlands convoy and I live in Warwickshire it would be good to know.
-
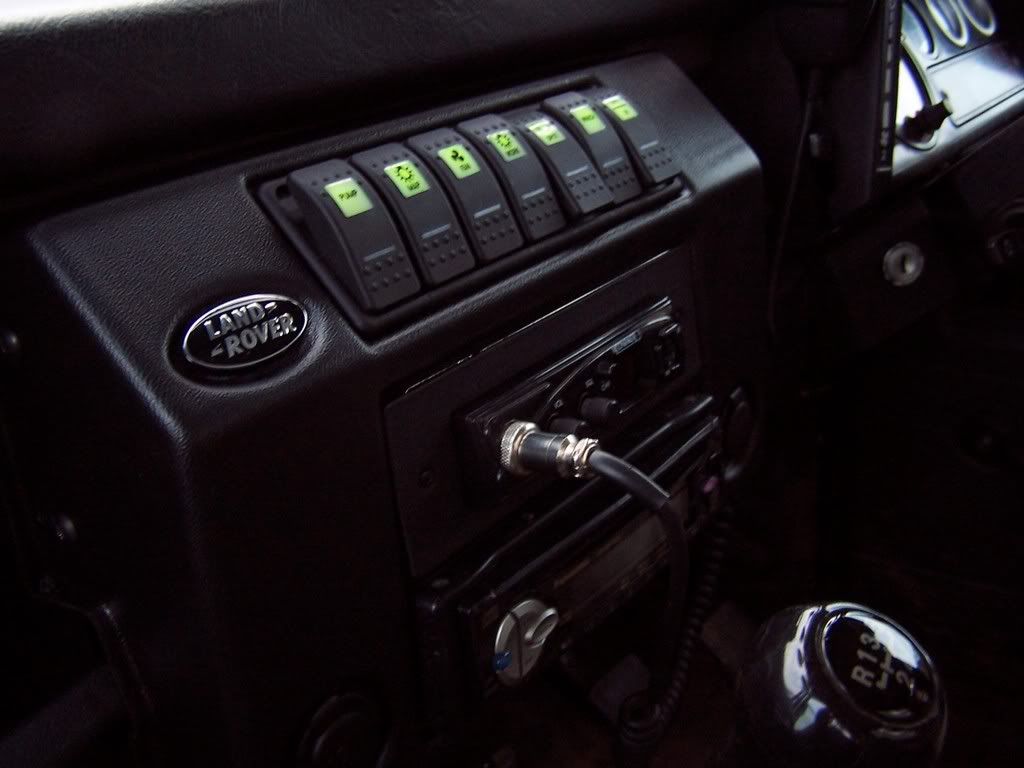
Do you get much reflection off the screen at night with the switches on top?
No, i've never noticed it, the lights arn't that bright and there is no glare off them.
-
Hi all,
Thought it may turn out to be useful for someone? I did originally post up asking for advice and opinions on which dash to buy(Mud or Raptor), but that thread seems to have vanished?
Any how, I went for the Mud console because I like the factory look of the switches and the finish on the dash is pretty similar to the standard trim in the car, it arrived in less than twenty four hours and is fairly simple to install


Wasn't that cheap in the end £147 with all the switches shown, plus red hazzard one which is already installed in the truck(just need to pop it in) 12v power outlet,Land Rover badge plus some stick on legends to identify whats, what?(which fit on the white squares,not done yet) The switches themselves I think are cool, big solid clunk noise when they are used, they also light up green(same as dash) when lights are on and when one is turned on it also lights up orange as a visual indicator that some thing is on. Lots of room as you can see behind for wires and the like, I am thinking of put two relays and the fuse board behind here as its only 4 screws to take off the front, which I know some will dissagree with but it keeps wires and stuff out the way and tidy.
So just the CB to fit in the space that is left below the switches, which will be done in a bit (if I can get some work done
 )beforehand.
Looking good.
I went the other way to give the wiring for the switches more room, also having the din plate on the bottom the CD player does not move as it's not suspended, I also prefer the viewing angle of the switches from the top, however they look good which ever way you go.
-
This is a simple way of doing things
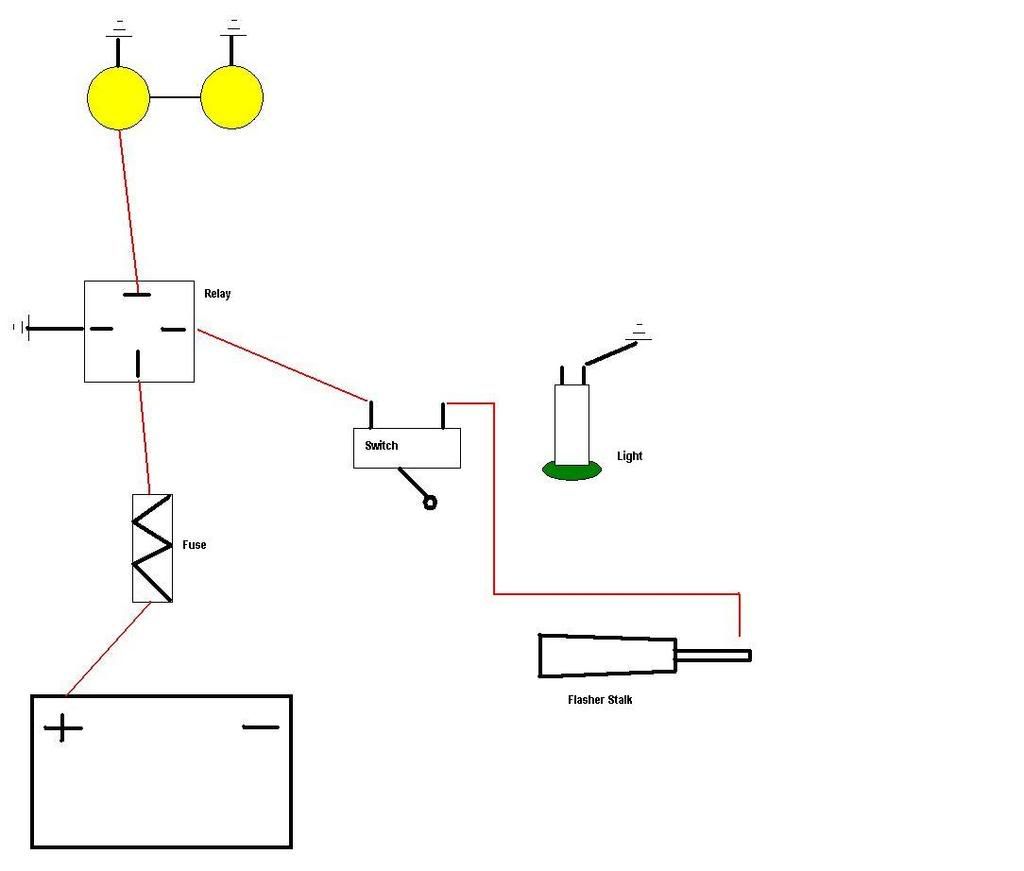
However the best way is to have an On/Off/On switch run in reverse, so the output on the switch becomes the input (off)
you then have 2 ways of switching (2 on switches) 1 of them you wire direct to the input on the relay/s so you can have spots on without highbeam or headlights, this is used for fording when in use with roof mounted lights. = headlights off roof lights on.
second on switch comes from the flasher stalk to the same input on the relay = spot work in conjuntion with highbeam.
Sorry dont have time to draw a diagram, however I knows its been documented on here before.
-
How did this go, it sounds like a great idea.
any post event news or pics?
-
I'm looking at the turbo kit at the moment, however (correct me if I'm wrong) when you are winching in on 24v, you are only charging 1 battery as the Aux battery flicks to draw only, when you release the switch the turbo box supplies power back to both batteries, thus if using for heavy winching you could completely drain the second battery and thus over time it will fail.
-
12v Albright will suit
it is just the Switching that is 12 or 24 that is different
Thanks Tony
-
I've just serviced my 8274 and added a Bow II 12v to the winch, on the day of fitting the solenoid decided to pack up (albright copy) I purchased a new Albright from the gang at Devon My link and all works well.
Looking around on various forums I started reading about the David Bower Turbo Boost set up, i've been thinking about 24v for a while, however could not really be bothered to set up another alternator just to run the winch.
Anyhow reading about this it provides me with a reasonable solution, however what I need to know is, can I run the turbo boost via my 12v Albright, or do I need to order the 24v version? I'm not sure if the ratings are based on the switch side of the solenoid or the heavy power side.
Mark
-
Haven't got a photo to hand but the mirror doesn't bolt in, it clips into place so it is easily dislodged in the event of an accident.
Which I have done many times whilst working in the cab


-
Diff should go straight on, you probably have drum rear brakes so it may be worth swapping the whole axel to give you disc all around. not much extra work.
-
all done, the solenoid was faulty.
The albright went on today and works well, it maybe me but it seems to have a bit more power to the winch.
Anyhow, I was wondering about storage tension on the Dyneema / winch (8274), when you wind in and put tension on the drum the brake comes on, should it be left like this when not in use, or should it be backed of a little to release pressure on the brake?
-
The only way the motor could continue running, is if the solenoid stayed closed...
Either the solenoid is faulty, or its being told to stay closed (ie a faulty switch/remote)?
That's what I had initially thought, I turned the remote off however the remote really could have stuck I suppose, anyhow the new Albright is ordered and if this doesn't work it's new remote time.
-
I upgraded my winch motor on my 8274 yesterday along with new brakes and service kit which I got from Jim, when I was winding the rope back on via wireless control I released the button and the winch kept on running, I cut the kill switch key (a must on all offroaders with winches) and set it to free spool, checked all connections and all were correct. tried again and got the same, I've now removed the solenoid (albright look alike I think) stripped it down and found a few little fragments of plastic loose but nothing to confirm it was at fault.
My head says it's the solenoid, however is there anything within the winch motor (brand new) which could cause this issue? I've ordered a new solenoid (Extra duty) from Devon, however I'm just trying to get answers in case this is not the cause.
-
Hi Go Red and Welcome,
the A frame ball joint is an easy job, remove the A-Frame, can be fun at times and find someone with a press, it saves hours of heating & beating, once out line it up and press it home a little try to avoid the damageing the rubber, put the bolts back in and tighten up, job done.
-
take a look in the tech section there is a link to a full rebuild
and a pair of Mole Grips to hold the brake together.
Cheers Tony, I did have a look in there, however my pc is playing up and could not expand the pics, I'm interested to see how to hold the bearings in place, the thread states sticky grease, however i wondered what happens when it gets warm, will it run and effect the braking.
-
they blamed parasitic drains. (d2)
can you get tablets for that
I use the Exide Maximas x 2 they have been great.
-
behind the flywheel mount on the mainshaft.
I think you mean from around the rear main journal on the crank?
If it was, then the leak wouldn't manifest itself from the wading plug hole, but between the flywheel housing and the rear of the block. On mine there is a gasket between these two parts - I would agree that mine was also leaking from there before I put it all back together. And yes, I chose to run a bead of silicone for a belt and braces approach.
Here's another couple of photo's:
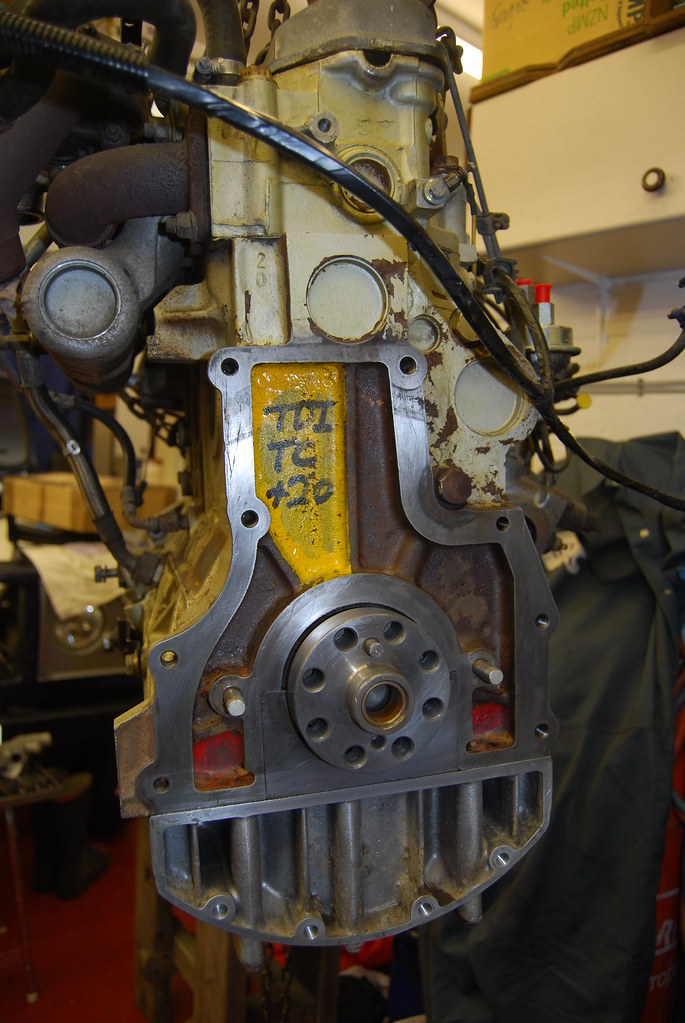
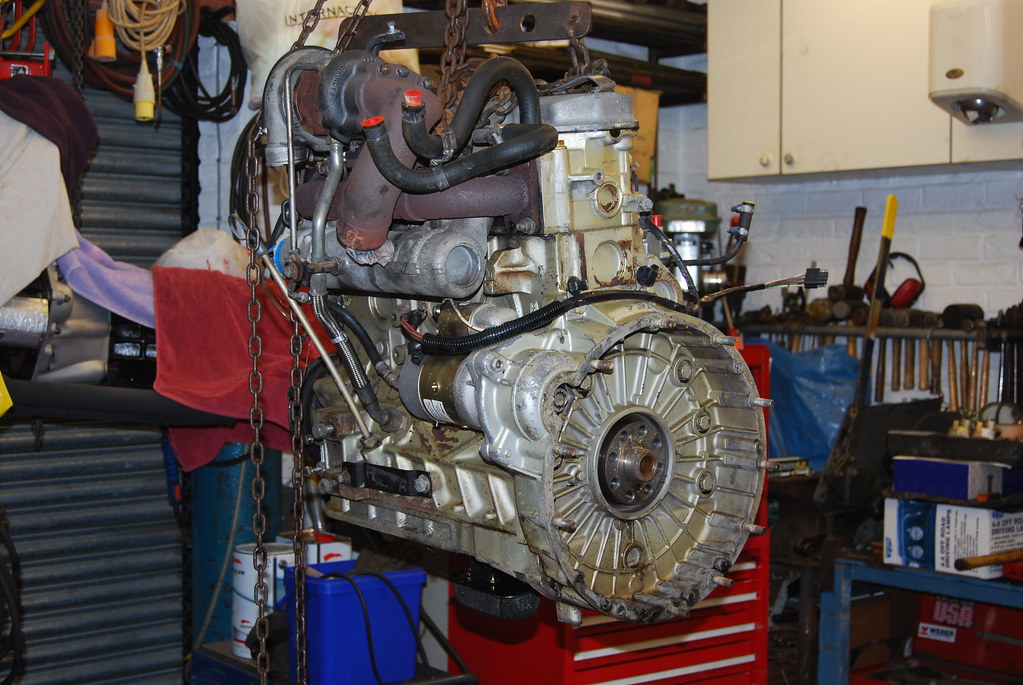
That's where mine drips from also however not that much, will this cuase any problems it's been like it for 12 months gets regular oil changes and seems to be ok.
-
I'm giving the 8274 some love this weekend, got some new brakes from Jim and a service kit, along with a Bow II :grin: does anyone have any does and don'ts and watch out for and knowledge they would like to share please. I'm hoping it will become obvious to me when I open it up.
One question, I hear the bearings are a PITA to fit, any clues on how to hold them in whilst fitting.
Mark.
-
Hi Rob, I hope this does not sound obvious, but do you have the springs retained top and bottom, which would stop them dislocating?
-
Hi Rob, personally I think the -2" mounts are a waste of time unless you are expecting your front axle to drop level, by lowering the shock mounts what you gain in drop on one side you lose on compression on the other side, as the shock will bottom out, thus nothing gained.
If you look at Gwyn Lewis's set up, he supplies +5.5" shocks and +2" turrets, this gives you the extra drop and with the turret being +2" also the extra compression = more flex.
I use his kit, and unless you want to go to QT 3 link system's or coil over shocks, it's about the best bolt on solution. QT also do a nice weekender Kit.
If you choose to upgrade, do some research as questions and give Gwyn or QT a call, they will all help out.
-
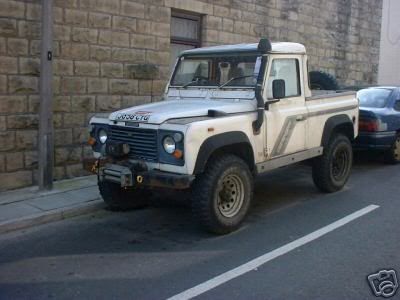
It get a respray once a year, usually followed by a trip down some lane and I wonder why I bothered.
Anyhow, I'm off to put some fuel in so I can run Blackpool illuminations.
Hey Stumpy, guess what colour it used to be before I bought it.
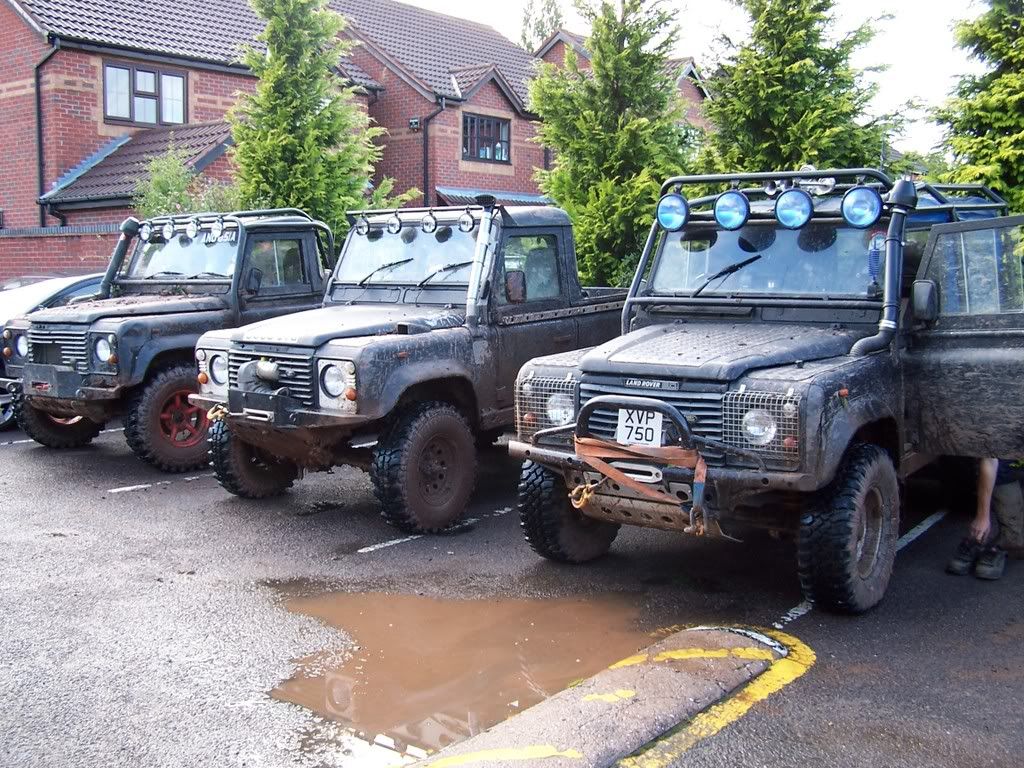
Meet the family


-
As above really ,if there's no obvious sign of fluid missing or leaking then the fork is probably the answer, if you do go this route and have to replace it, get some 6mm steel and weld it to the back of fork to strengthen the effected area, you could also just build some weld up to thicken it.
good luck anyhow.
-
personally I think it looks pants! Not being an old school fuddyduddy or any thing but when I see vehicles painted like this, I think, well thats the end of that one, because I cant believe anyone who would look after a car properly would do that. I think its a short term paint job before it gets trashed. Maybe ok for a filmset. When you finished playing with it who is going to want to buy it looking like that. its almost anti-Boyracer, but it has the opposite effect, in that it screems yob! Don't wish to offend, but it WILL look cr#p.

Stumpy, you've obviously not done much laning and like to keep the poor LR paintwork as clean as possible, thus why you have a nice white ambulance IMO of course, this paint works well for me as after laning and play day's a light rubbing down and spraying it's back as new as it will ever be, it's not my main vehicle it's a motor to be used and enjoyed, i've gathered you posted to gain a response as if you we're not bothered you could have kept the lip shut

Anyhow, I like it and most people who see it seem to agree, enjoy your cleaning and polishing, try using it sometime. ne nar ne nar

-
ZuluBlue.
What paint did you use for your wheels?
Hard Hat again, sorry can't remember the paint number, if I find a spare can with the code i'll email you.


 )beforehand.

Snorkels
in Defender Forum (1983 - 2016)
Posted
I had one of these, steer well clear, it cost me a new engine. I went southdown in the end.