


Team Idris
-
Posts
1,606 -
Joined
-
Last visited
-
Days Won
5
Content Type
Profiles
Forums
Events
Gallery
Blogs
Posts posted by Team Idris
-
-
Quite a bit of time in this wing, maybe 6 hours? But not on the dragon-scales paint, as that didn't take long to do with rattle cans and a serial box template

Work on it has been; remove spat, clean all the joints back to bare metal, 100% tig weld (to ally rolled into sheet in the 60's), fit a 2mm ally strip for the spat to re-attach, fit new front panel, etch paint, black paint, re-fit spat, re-align mountings and photograph ! You wouldn't believe how bad it was before I started. Fatigue cracks were nearly through the outer panel and front edge was kind of held on by the rubber. Also, the scaffold-tube wing bar was sitting too high, leaving the panel work with no back strength, so that has been dropped a couple of inches.
Also changed the rear ball joint for a Gwyn one.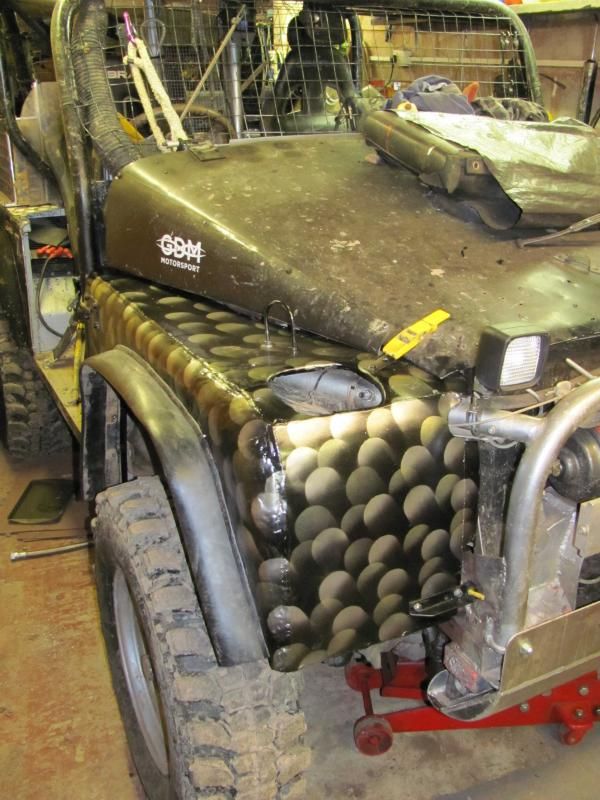
Need to do the other wing to matchPlus, you know you are getting old when - You sit down to weld

-
I'm glad I thrashed mine in with a lump hammer now I've seen that
-
If you over tighten them they grab each other and then they are worse than rusted bolts to undo. But you can use SS bolts and ordinary nylock nuts. Maybe they'll still corrode solid, but drill the nut, chisel it and the bolt isn't stuck in. So far mixing 8.8 and SS has worked for me.
I suspect that if you use A2 for one and A4 for the other they don't lock up? I had wondered about brass nuts?
-
As Simon says, big pipe is good. I have 38mm which is maybe as small as is viable on an RV8? If you can do it in metal and get it where air can circulate it is good extra cooling to offset the pumping losses. I run Steel exhaust pipe and as long as there is a good mix of antifreeze it is okay. I'd say mine from 1995 is rustier outside than on the inside
I like the idea of an electric pump and it sorts a lot of stuff out. But it is another level of stuff to go weird. If you need to charge well you'll probably keep the revs up to 1100rpm all the time? Then the water flow from the normal pump will be okay.
-
You have to look at them from the perspective of the whole rad and at the individual fin passages. No point buying a rad and then using one bit of it ! Might as well buy a rad and use every last bit of fin. The sucking fan does this, as it pulls a vacuum and atmospheric pressure then pushes air through all the fins (within reason). You need at least a couple of inches between the fan blades and fins so the air can get away.
Unfortunately a sucking fan is working in the hot air leaving the rad, so it needs to be a heat rated motor. Stuff like Spal is fine with it, and it depends how hard the fan is working to pull air. But if you go to a blowing fan, the corners of the rad don't work and nor does the hub bit in the middle. Even a deep fan box doesn't fix this. This isn't an issue on a front rad as moving along shoves air through all of it.
-
Actually, the RV8 generates a lot of heat at tick over, and that's your biggest enemy. At revs it has a good water pump flow. I need a fan on full at tick over on the drive.
A lot of the stuff you can get away with on a front rad, won't work on a rear rad. Waving a fan at the fins won't cut it. You need a proper fan box with a divider for two fans. Then one can work while the other is switched off. One is on the ignition while one is on the thermostat. Or; you buy a 3 pin thermostat so one cuts in when it is warm and the second when it is hot. The fan cowl/box needs to be at least 50mm deep.
Blowing fans run with a cool motor, but sucking fans make the rad work better. You can run a blowing fan one side and a sucking fan the other.
Some rads are high up, but mine is really low in the bed. I have no windscreen. I've seen clear plastic duct work so the rad is low, the intake high, and you can still see to reverse
I have two fans working as blowers on a thermostat and a big old Kenlow fan sucking all the while. I run it on half speed for trialling and marshalling, but full speed for winch challenge. If the engine gets worked a bit the other two blow more air through. Both have fan cowls with foam seals and the rad sits between them held in place by them. Then it can move around as it needs.
If you can get the air out and keep it out they work really well. Normally if they suddenly give trouble it's a head gasket problem. The front rad is always going to be better with a duff head gasket. But if you make the pipes low at one place only, any gas will work to the top of the engine or the rad. Then your header tanks / header tank can deal with it.
-
Carburettor Exchange charged me £85 each a while back. They did run well afterward.
-
I thought he had gone on a trip?
-
Terry Winchman uses hydraulic oil. It doesn't go stinky like the soluble oil. And when that water mix oil goes stinky you pretty much have to wash the machine out
-
At that age any single part could be broken, and all of them will be worn.
From an automotive perspective;
It can't leak if it has no oil in it,
fatigue cracks will be an issue,
does a magnet stick to the steel bits?
Do a standard vehicle check. Jack it up and wobble stuff. There's nothing on there that is unbelievably difficult to fix or weld up. The engine is the same block as the diesel so it is pretty tough.
If it is really bad, pay less
-
I would think both trucks have achieved what they intended by getting 'air time' on forums ? It is a very cheap trick by advertising standards. Especially with a 'show' easily costing 2k and up
-
Looks like it will be tidy and run well, by the photo.
I was thinking it would rope-saw a slot in the ally fair lead with the front rope always being on the same bit. (Hence the 'U' shape I had in mind) But I guess it's done 80 of the 90 degrees turn by then.
Maybe there is a bearing with the same outer diameter but a bigger inner? If you do need to machine something I wonder if it is better to machine the pulley for a bearing you can find stock bar for. Isn't 15mm just about no where for anything?
The Bearings should last for ever but mine pack clay in there. I need to look before I next race thinking about it
I worry about the slack rope jamming on the inside on mine. Has the rope somewhere to lie behind the pulley on yours?
-
The only tech thing I can see is that the chassis pulley has the front pull on it and the side pull, so vector wise a 5 tonne rope force creates maybe a 7+ tonne directed at a 45 degree angle. But I think a low grade steel would do at 15mm. Depends where it shoots off to if it breaks
We run big ally bobbins on ball race bearings so the rope has a chance of staying on them for 90% of pulls. Getting the rope down the side of a pulley is bad as it always snaps at that stressed point in the fibres. I have various bits of tube to guide it in. Behind the vertical bobbins are two horizontal rollers. They are wider than the gap between the bobbins.
I think you mean a pulley in the rear cross member with a 'U' shaped ally fairlead? Where the slot goes left-right and the open end of the 'U' points to the chassis pulley? So the rope doesn't touch the ally work on front pulls, but directs the rope on other pulls. Sounds really good
It is real easy to cock it up. My side/corner fairleads make the rope go past the exhaust pipe in use
 Thinking of every eventuality sure is difficult.
 -
Fuel from the overflow means the bowl is too full, so back to your stuck float, failed float-valve or debris in the float valve. What's your filter like?
-
This is coming up regular now, by the standards of weird faults. I think it's a flow issue against the pressure-reducing-valve. It isn't allowing enough flow to overcome the springy-ness of the seals. And I believe the fix is to remove the calliper and push the pistons out a little with the pedal and re-fit, so the pads are already touching. Or use a brake clamp to hold fluid in the calliper like; Push down pedal, lock off rubber hose, release pedal, press pedal again, let more oil through, until the seals are fully out.
But maybe the valve is duff? I had them on Deutz and I have one on the van. They seem okay. I guess it could be duel circuitproblem, but I thought oil went to the back axel from both sides, and only from the good side if the other half blows out? It's a shuttle valve thing on some vehicles.
-
It's the steam that gets them, when water hits the manifolds. It gets in everywhere as a gas and then condenses.
I've got SU carbs and points distributor with an old-school amplifier and it's been known to throw water out onto the wing off of the belts in deep mud. I run a chepo compressor pumping air into the distributor body off a dash switch. Other than that, it had no changes. (no silicon or grease sealing). But keeping the leads separated makes a difference on the V8 and my Pinto van.
So I don't know what's wrong, but it can't be miles off wading up to the crank line.
-
Going independent is an interesting plan, even if it is only on the front. My mates Vit handled way better than my RRC buggy. You could spend a lot on the front axel, near nothing on the rear or transmission and have a very good vehicle. If you are handy with a welder, the only real problem is the front diff assembly. (locker or not).
-
I've read it twice and it sounds wrong?
"-2 bits with my +2 spacers and new +2 pin pin dampers" sounds like you'll smash the shock mounts off. And maybe it should be +2 dampers and plus 2" bump stops so the whole lot moves down 2". But then you have no more axel twist than before.
I'd go +2 springs with a higher rate, to jack up and compensate for the winch. (I think I did by using RRC rears up front).Anyhoo, when I studied my 1972 RRC chassis I found with no springs on and full articulation, the shock just nearly bottomed out. That's the main risk, so worth cycling the suspension with no springs on and make sure the bump stops do something
I know mine isn't a 110, but it is very similar and I have had the same sagging front end.
-
You can pull the chassis ears off no problem and a good side impact will narrow the chassis. We polished the edges of the big steel washers on the front radius arm rubbers. It's hard on the front axel. The back does kind of follow.
A good big belly plate that is well bolted to the chassis rails sorts most of it. (M12 or bigger). Add some metal to the rear chassis mounts. I think you can pull the A frame mounts off as well?
If it looks like it can bend and fatigue, it probably will.
Worth pointing out that stress raisers are a problem that you add in the build. Most coilers like to gimp the chassis where it rises to the rear if it lands hard on the cage. But I don't think 110 chassis will do that? 6mm to 2mm is going to weld stress it. If I was going again I would try to get a structural ring welded in around that bell housing. It has a lot of load going all directions in that area.
You can build to spread the stress or to keep as much as possible all in one area. I have a lot going on around the A frame cross member of; roll bar, roll bar braces, winches, belt points, skid mount, arm mounts and a big old bit of flat to stop chassis twist. Its about deciding where to use which philosophy?
Hopefully that helps a bit
-
According to Ashcroft it can go high when it goes into lockup?
I've had 3/8" rubber pipe on for ages, but I rarely take it out of second gear. I can say for sure that those intercal coolers everyone uses don't do much over 100psi, and that should be well within rubber hose capability. Double hose clip and good hose should do it.
-
Are they all the same in the UK? Normally land rover stuff all fails the same way and D2 like to rot the rear chassis as well. So have you considered an Australian import? Allegedly the right money with no body rot. Probably done star ship miles, but there are plenty of mechanical bits in the UK.
-
I've seen rear engine vehicles behaving badly on jumps as well. Maybe it is because beach buggy's and sand rails have absolutely no weight up front that they don't try to flip end over end like rear engine 4x4's? It does look like a vertical version of Porshe syndrome. It seems less of an effect on that ford focus and the pugot's. So in a way you could say; where do you want to sit in your mid engine 4x4' at the front like a focus, or at the back like a Thug?
Saley's winch truck is rear engine. No noticeable difference to the Beast except it's longer. The rear engine doesn't make it kick ass or suck to any visible amount. But it does look a load easier to work on
In my mind it can flip the front axel up onto stuff easier. The Beast likes to plough-on due to front winch mass.
I'd be less inclined to flip the V8 as it is already light weight. I have rad, batteries and fuel in the back, and it isn't too far off. Afterall, the gearbox set is as heavy as the engine, if not heavier ?
-
We did the solstice bonfire Sunday night. Onto Christmas lunch
I thought Santa was the green man until he went Coka Cola red?
-
More sticky than a broken return spring?

 Thinking of every eventuality sure is difficult.
Electric Block Heaters
in Defender Forum (1983 - 2016)
Posted
My socket faces sort of backward so it 'auto yanks'.
"Toasty out-cold back" isn't as bad as you think, as it normally gets warmer throughout the day.
Are we talking core plug block heater? I see what they do, but I prefer my Kenlow heater/pump combo brick, as it warms the heater matrix. But maybe that is kind of over-rated as it soon goes cooler again. At the moment I have the Kenlow and a green house air heater on timers. And new for this year, some Ebay heated seat pads
Might connect a small charger as well?
I run 10 mins to work and it has saved my engine from the dreaded white gunk, so maybe the best mod I've done
I guess the main thing is cable runs. If it chafes through you could have a live truck sat on rubber tyres?
Engine oil heater and a gearbox oil heater would be nice. Perhaps the gearbox heater before engine oil? (The oil is warm once it has been around once). Depends how much your syncro hubs hate thick oil. Mine hate it. Once the 240v wiring is in place there's mucho opportunity. No need to run an extension lead to use a drill