


Scotts90
-
Posts
1,651 -
Joined
-
Last visited
-
Days Won
23
Content Type
Profiles
Forums
Events
Gallery
Blogs
Posts posted by Scotts90
-
-
Get busy with a tape measure and compare sides of the chassis. Sometimes it can be easier with string and go from datum to datum eg outer crossmember to shocker mounting etc. pick a set of points that would show if it is out of square (remember it's a landy...it may not be 100% out the box). Check your rear door and the tailgate hinges, if the wheel got struck then it may have sustained some damage too.
It's a punto so not the strongest of vehicles in the first place...it does however confirm your crossmember is solid!
-
We used to have proban treated workwear but it's a coating which reduces after each wash. We now have nomex or similar to save us being burnt to a crisp...doesn't stop molten blobs though!
-
Les' guide can be found here... http://forums.lr4x4.com/index.php?showtopic=67196&page=17
The whole thread is worth a read if you've got the time.
-
You always notice the uv burns in the shower when things get a bit "nippy" lol. We all do it, just a quick weld turns into a bigger weld with the MIG wound up to max.
Need to get some of those Kevlar sleeves too methinks
-
It's always a good indication of how high your pain threshold is! That elusive blob always gets down a sleeve or down the back of your overalls and settles in some tender areas...got weld burns and blisters in some weird places through the years.
-
 1
1
-
-
It may also be easier to "join the dots" rather than try for a nice run. Can also save time having to grind back a whole run when it goes Pete tong. Also check the the tip is tight and the nozzle is free of slag, if the weld area is a bit carp it doesn't take much spatter to foul things up.
-
Are you welding outside? If the wind is blowing the sheilding gas away then it leads to very poor welds
-
I sprayed the whole of mine...inside/outside etc. I made a purpose built booth from a gazebo frame and fitted it with inlet filters for air circulation and a large outlet filter. I bit the bullet and bought a full air fed mask and an external triple set of coalescing filters for breathable compressor fed air as well as a pro spec devilbiss gun.
Ensure everything is clean, degrease and tack rag prior to painting, preparation is everything here. As for mix ratio...ask the paint supplier/manufacturer...they can be different from maker to maker. Gun tip size also makes a difference, you don't want to use a primer tip (1.8-2.0mm) for top/base or clear, again the paint shop or manufacturers data sheet can tell you suitable tip size and spraying pressure. My clear gun has a 1.3mm tip and requires 3bar at the gun. 3M and Gerson supply suitable cartridge type filter masks, I used these for my isocyanate free hi-build primer layers. Also ensure your compressor is up to the task, I ran two 3hp compressors with storage of 200litres, fed into a pipe system with filters and water traps/drops. Most small compressors won't keep up with the demand of a decent spray gun. Heat the area and panel too as mentioned previously.
It sounds like a lot of faffing about but the details help give a pro finish, I did lots of research as a) I wanted to learn to do it properly and b) the amount of work I put in to my 90 I didn't want a bodyshop to make a mess of it! If I wasn't happy with the finish then I flatted, re prepped and repainted.
You can get a bodyshop finish, I have been asked who painted mine and it's met with some disbelief when I say it was done by me in my shed. It is actually better than some pro jobs I've seen.
Les Brock's build thread in the members section gives a great step by step guide on painting with 2k paint
-
I imagine it's similar to cutting an olive (compression ring) off copper pipe. Cutting diagonally across the arm to give a greater cut area (hence weaker) then splitting with a chisel
-
Could be highly coincidental that the clutch release bearing is giving up the ghost or the springs on the friction plate are rattling. Given that you are running +50% horsepower and lord knows how much of a torque increase then it may just be on its way out. My HD clutch has a little rattle to it, it's a common thing from what I've read and it has done this since its rebuild so it doesn't concern me.
-
That looks good. I'm yet another in the "I want one" camp! A press is one of those tools that you don't need often but when you do it's normally with a degree of urgency. My panel forming normally involves some hardwood, hammers and swearing.
Heads off to eBay for a look.....
-
1
-
-
Ok, after a bit of digging...
The ones as shown WITHOUT the hole are listed as AMN710740 and AMN710750. This is from chassis 2A625489 and has no internal bulkhead...and what YRM are selling.
The ones WITH the hole are AMN711200 and AMN711210, these are for vehicles with a bulkhead.
Both listings refer to 90 CSW
-
I used a 10 ton bearing puller to great effect to remove mine, a bit of pressure applied then a judicious whack removed it with ease.
-
I got a lot from my local 4x4 specialist, been friends with the owners for years so I trust them. I can also vouch for Britcar, bought a lot from YRM and I have also purchased panels from SPLandrovers. I haven't experienced bad service from any real suppliers to be fair, although getting most parts locally means any issues are dealt with face to face and its "their" problem. The only issues have been with some private eBay sellers....but that's the gamble you take.
If you have a local LR specialist then it's worth asking them for stuff, they may stick a small amount on for their time/efforts but it can pay dividends in the long run
-
Does your handbrake warning light work? Should be one on a td5 era? The warning lights are easily obscured by a forearm, is it worth asking your mechanic if he drove it with the handbrake on? You have footage that it made the noise, if he admits it then it confirms the problem and narrows the places to check for damage.
-
It does sound like the transmission brake engaging to me. It may not have been properly disengaged causing the shoes to catch in the drum (gives a loud bang and shudder). At that speed I can't imagine it'd do much damage, may be worth stripping the drum off and checking the shoes.
It all depends on the state of other driveline components as to whether it may damage UJs/transfer box or diff internals
-
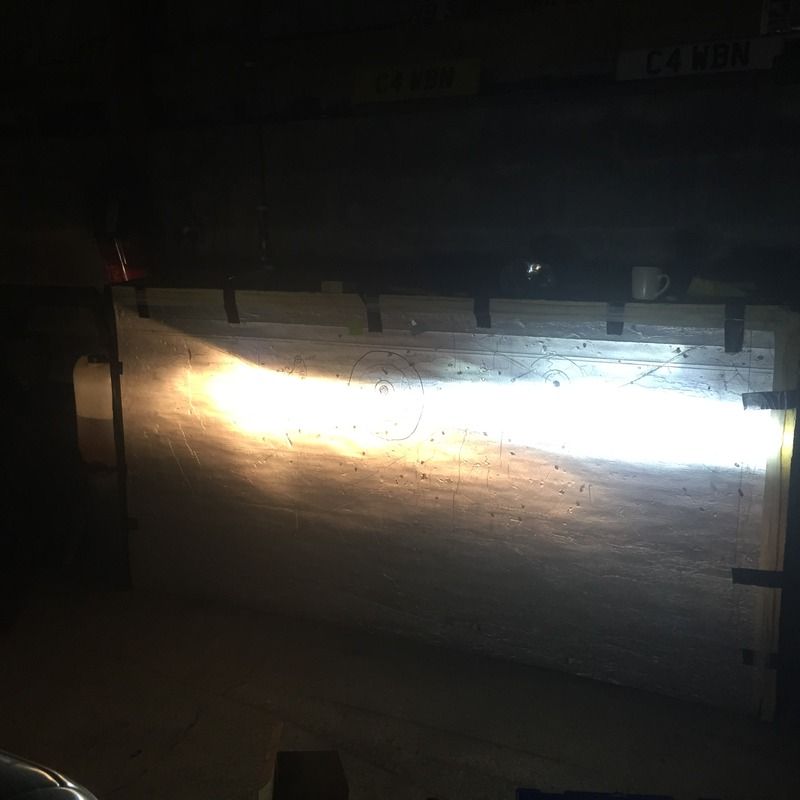
The near side was bang on, the off side was a fair bit lower and needed 3 turns to bring the beam up to the same point. It could be down to differences in my new bezels though.
-
Someone engaging the handbrake (not realising its a transmission brake) can cause a nice bang. You'd expect a mechanic to know better though.
-
Loose exhaust clamp sliding up and down the pipe? Something fouling the props?
-
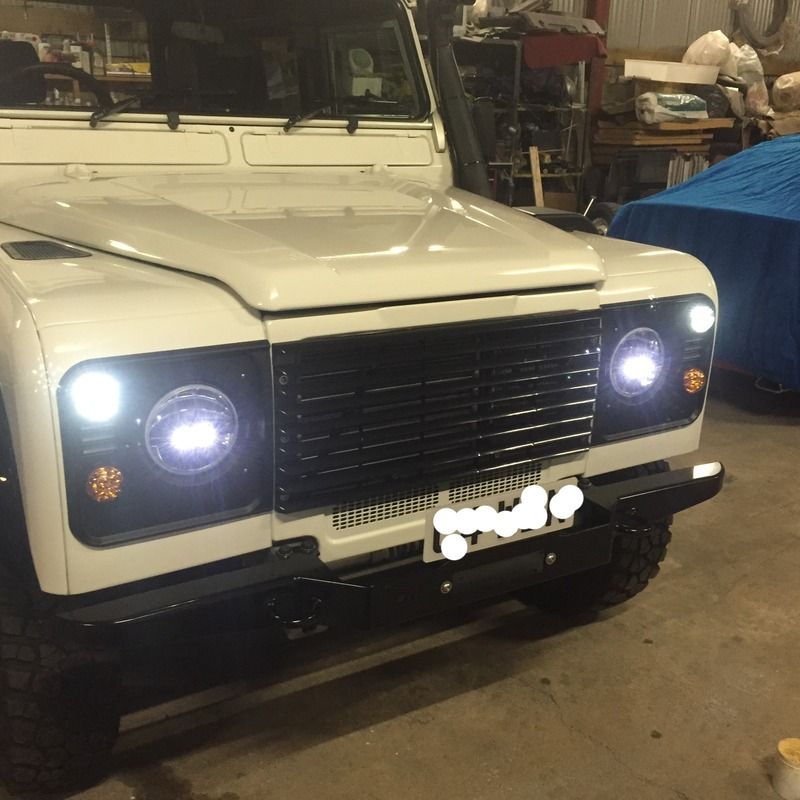
Got my bezels today so stuck mine in tonight. I thought I'd be smart and fit the female econoseals to the headlights....only to discover the nakatenenga splice looms come with 2 female sets and one male set of connectors. Bugger. So, a hunt around my electrical goodies was left wanting so it was a case of soldering and heat shrinking the splice loom to the headlights. Just a minor set back...and like the light wiring nakatenenga use the black for +12v on the loom too (green being earth)
Some pics
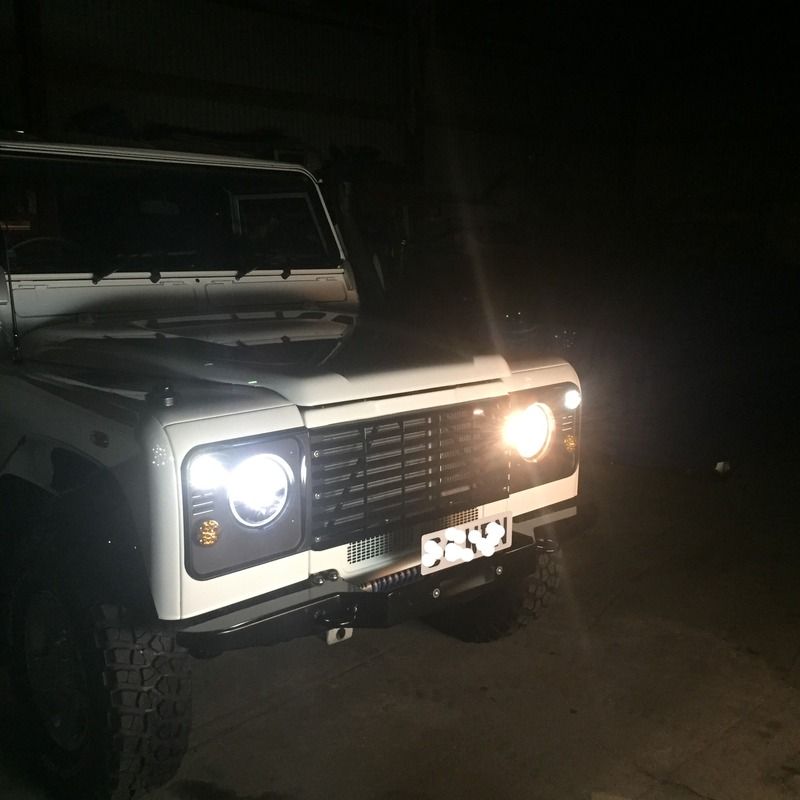
One of each
And the corresponding beams
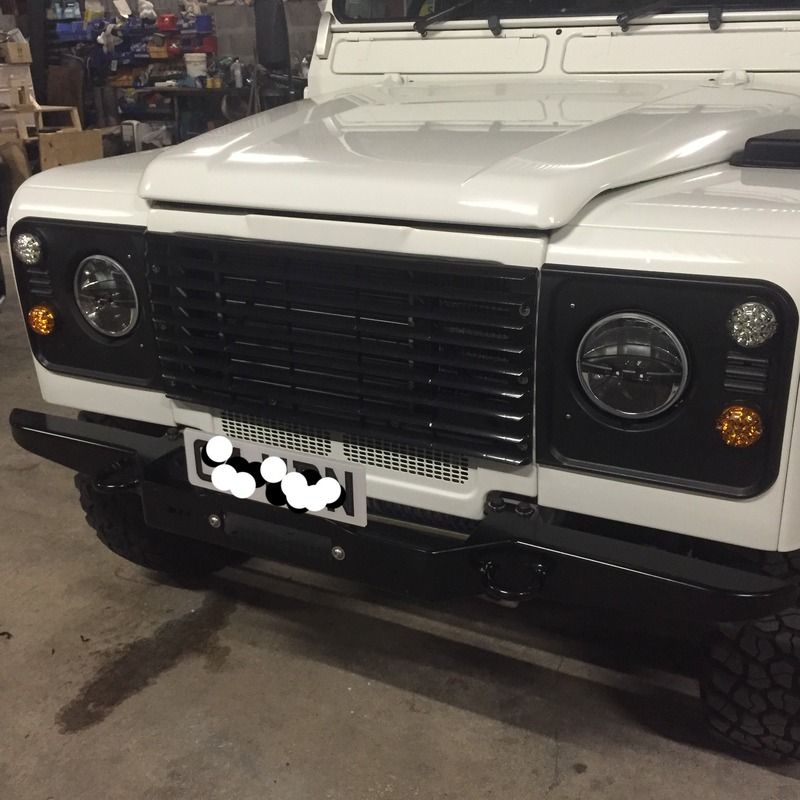
Both installed
Sidelights on
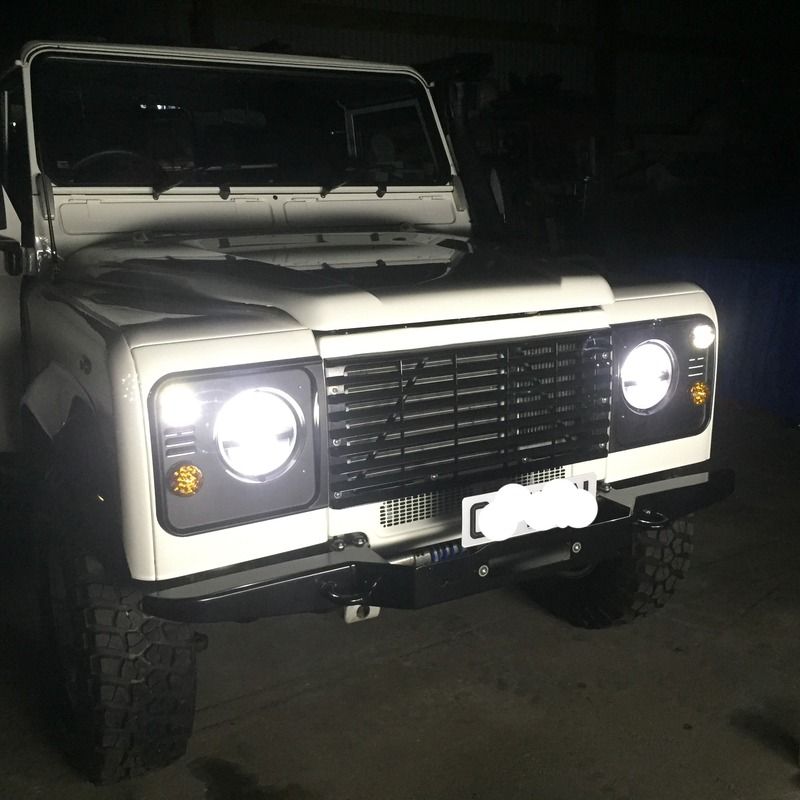
Main/dip beam
Haven't been out for a run but they're definitely bright!!
-
When I get round to fitting mine I'll mark up the existing beam pattern on the inside of the shed door then adjust the new lights to suit.
-
The video posted on page 1 was by a Swedish inhabitant....any issues with icing or snow?
-
I can't see engine heat soak being a concern. If the most common application for this style of light is on a jeep c-series which tend to have a large v8 or straight6 working in a greatly warmer climate then a draughty defender bay with our milder weather should be no problem.
-
The heated element is a nice solution.....but our snow in the UK doesn't really stay nice Virgin white for long. After the application of salt and sprays it turns into a nasty brown slush which as I'm sure we've all experienced dries to a nice opaque film on conventional halogens due to the heat. So on the flip side if the LED lights aren't getting so hot and are caked with a dirty salty solution then it should hopefully wipe off rather than being scraped off!
A lot of OE headlights are coming with LED hardware now so you have to assume that they will have been cold weather tested prior to approval??

How would you assess this?
in Defender Forum (1983 - 2016)
Posted
That's good. Did the 110 even move?