


landrovermanuk
-
Posts
161 -
Joined
-
Last visited
-
Days Won
2
Content Type
Profiles
Forums
Events
Gallery
Blogs
Posts posted by landrovermanuk
-
-
Absolutely gutted, I can't really go into details but a representative from JLR came to my work with a large scale model of the new Defender.
Unfortunately as the only Land Rover fan working, I was on a break when he came in...🙁
-
On Saturday, March 25, 2017 at 3:25 AM, Davo said:
Ah, style and taste, or for that matter refinement . . . where have they gone? I've realised that should I suddenly become extremely wealthy there is not one new vehicle I would buy, because they're all so goddamned ugly. What a great time to own older cars!
I don't know. I would buy the new 80" Defender or the back to basics two door Range Rover that LR have started to build...
")
-
 1
1
-
-
I seem to remember that on a previous thread, someone also put ducting inside the dash so that the hot air is directed straight to the vents...
-
We need a multi point lock, so when you lock the door a bar goes into the tub and the bulkhead...
-
How about a wire that plugs the Defender into the house?
Unplug the wire and an alarm goes off in the house unless switched off inside first...
-
In the interview last year, the guy said he asked to buy the tooling from LR.
They said no, so he said he would make all new tooling as it would have a better finish than the old LR stuff.
He made it sound like it would look exactly like the Defender but with better engines and quality control...
-
Caustic soda will get most stuff off...
You should be able to find a local company locally...
-
I've had good results with bilthamber's hydrate 80. As above, applied, then etch primed before adding primer and top coats.
cheers, Steve
I'm using hydrate 80, then a coat of electrox, followed by bilt hamber 2 pack epoxy mastic paint, then top coat...
Hopefully that will last a few years...
For the bits I cant get to I am soaking the parts in 9/1 water-molasses, then after a good wash and rub down with a scourer any bits I can reach, finally soaking them in 4/1 phosphoric acid - water...
Warnings... Phosphoric acid when mixed with water is pretty harmless unless you get it in your eyes and it stings like buggery if you have a cut, I have been working with bare hands without problems...
The 2 pk paint is a hard to get off your hands and needs xylene to clean up, so wear gloves...
-
Hopefully this works and there are some pictures of my 90 attached...John
]http://s163.photobucket.com/user/landrovermanuk/media/Mobile%20Uploads/20160131_161628.jpg.html]
-
I have one of his cross members on my 90.
I ordered it and pd and was given a delivery time. ..... sadly he left a whole batch out for the courier and some scrote nicked them...... so he had to make another batch. ..... mine came in kit form for me to fit, which was easy on my bare chassis. ..... I've had several comments about it and always give his name. .....
He is a top chap and his work puts many others to shame...
I just wish I could upload a couple pics of mine but my pc is playing up...
-
For some reason I can't up load any of my pictures, so until I sort out picture hosting, I have found these pics on line of Clive's work. John...


-
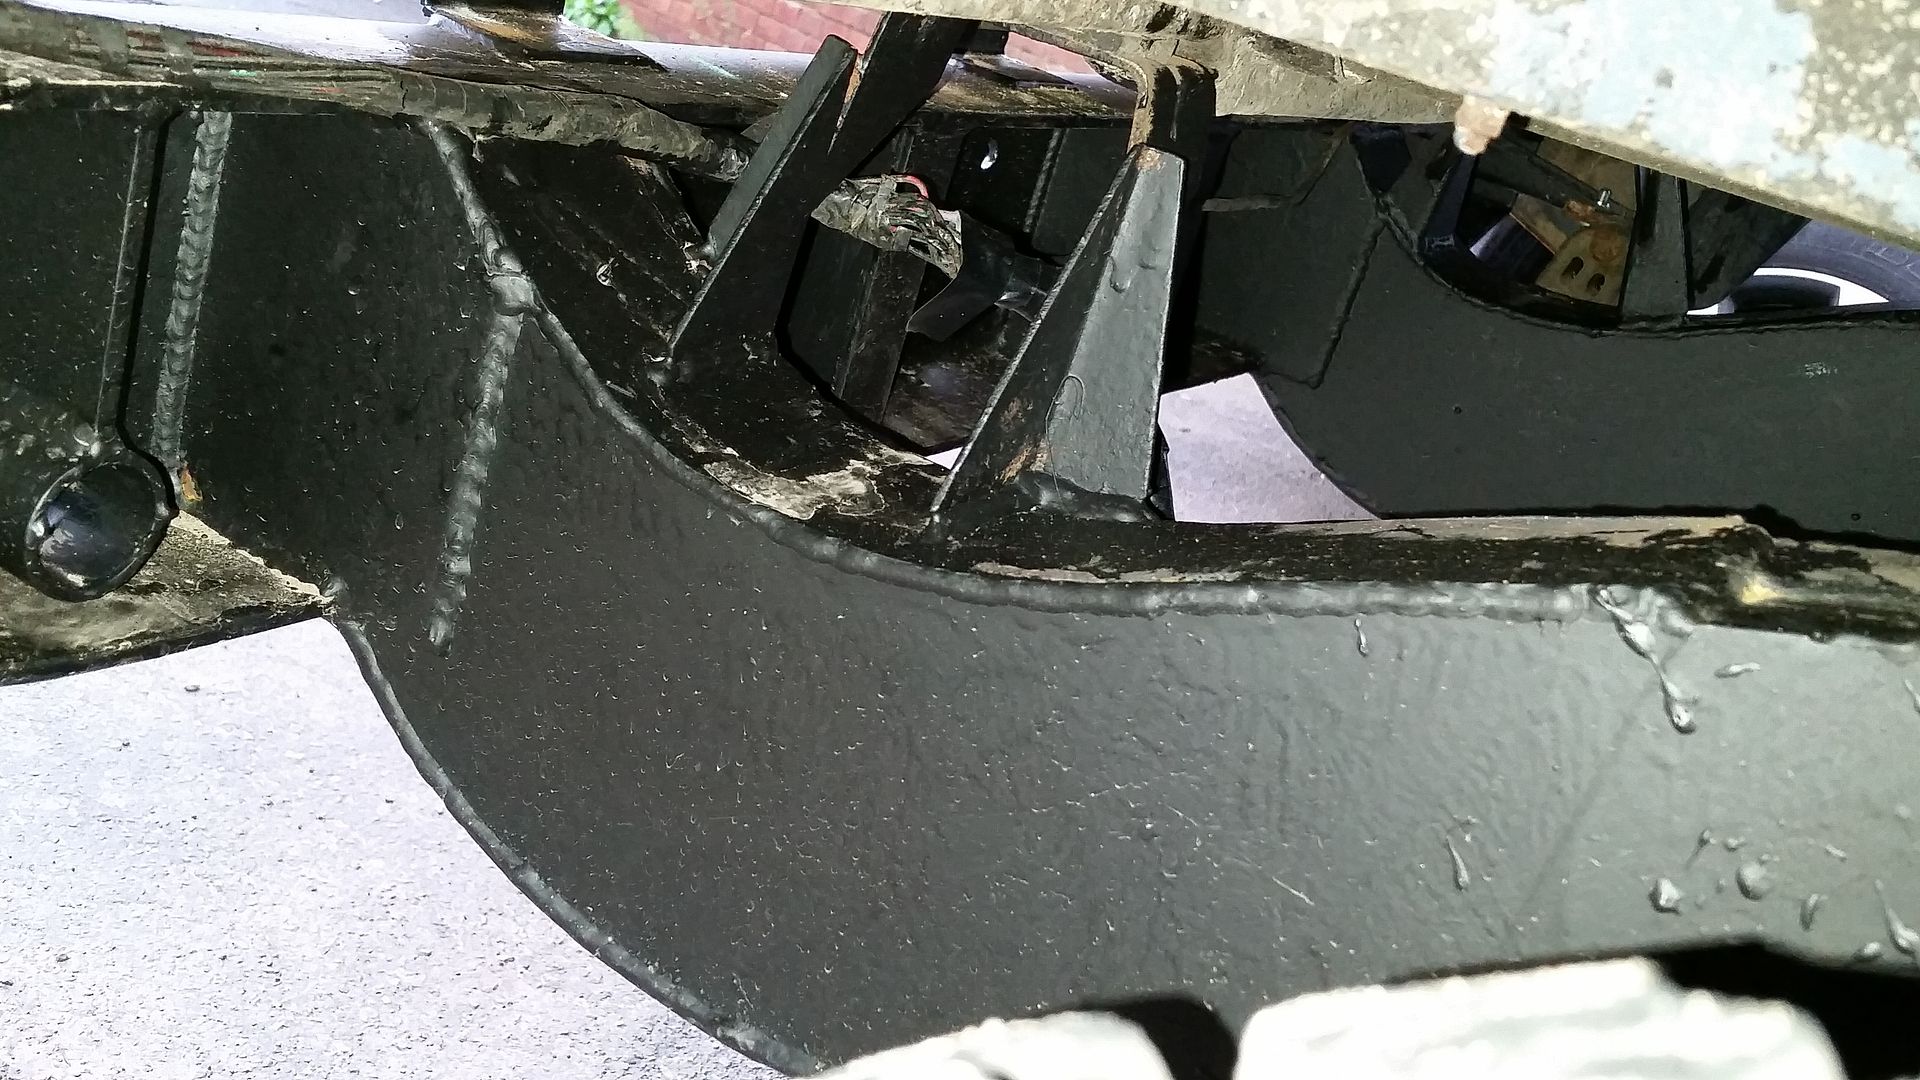
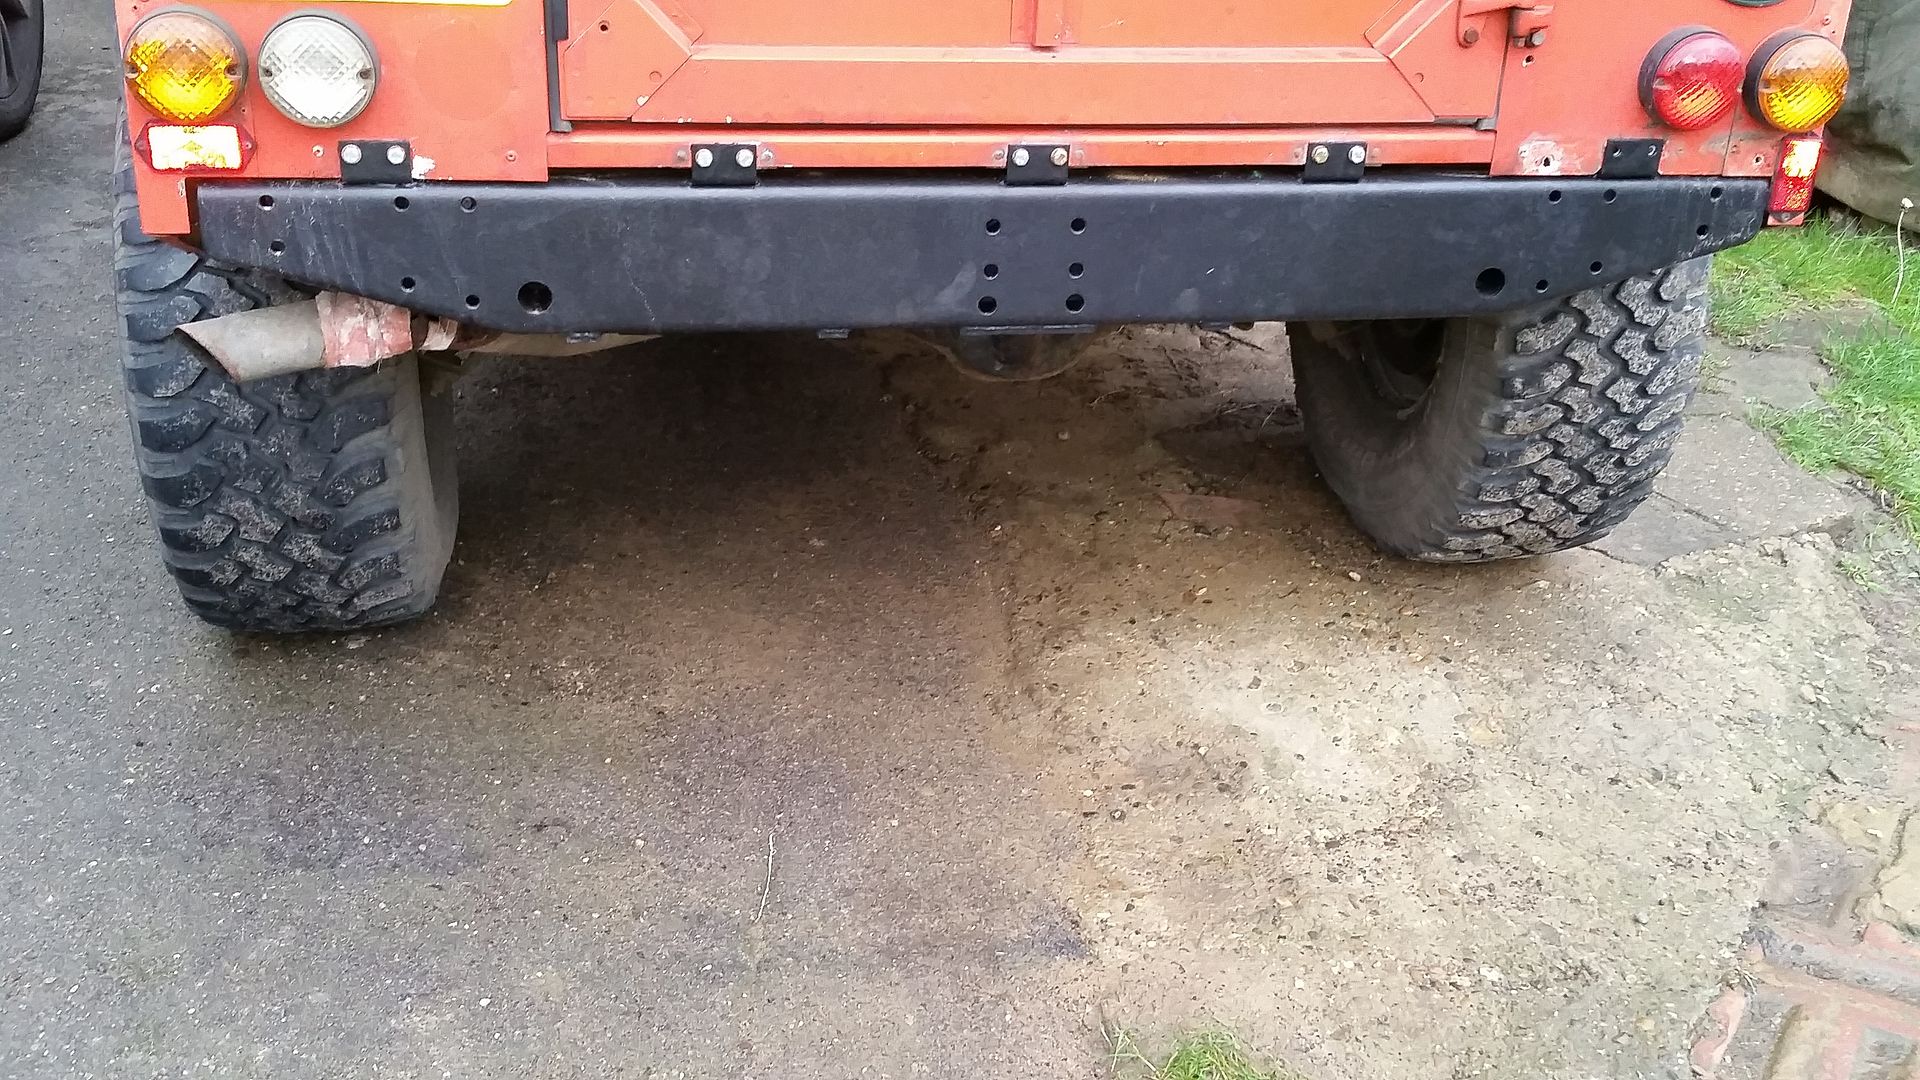
First of all, I must start off by apologising to Clive, I said I would do this a while back.
Like many of you, the rear cross member on my 90 was rotting and had been patched to get it through the MOT. Unfortunately as you know this is only a temporary fix.
After a lot of research I realised I had a few choices.
Build my own cross member, satisfying but realistically very slow in my case.
Buy a L/R cross member and have it fitted, expensive.
Buy a pattern part, dubious build quality.
Finally I found http://www.blacksheepcrossmember.co.uk/ I spent quite a while reading up about Clive and his cross members. All the reviews told of the highest quality work. I was sold.
I contacted Clive and he came round to see the 90. A price was agreed and the last weekend in January was booked for the work.
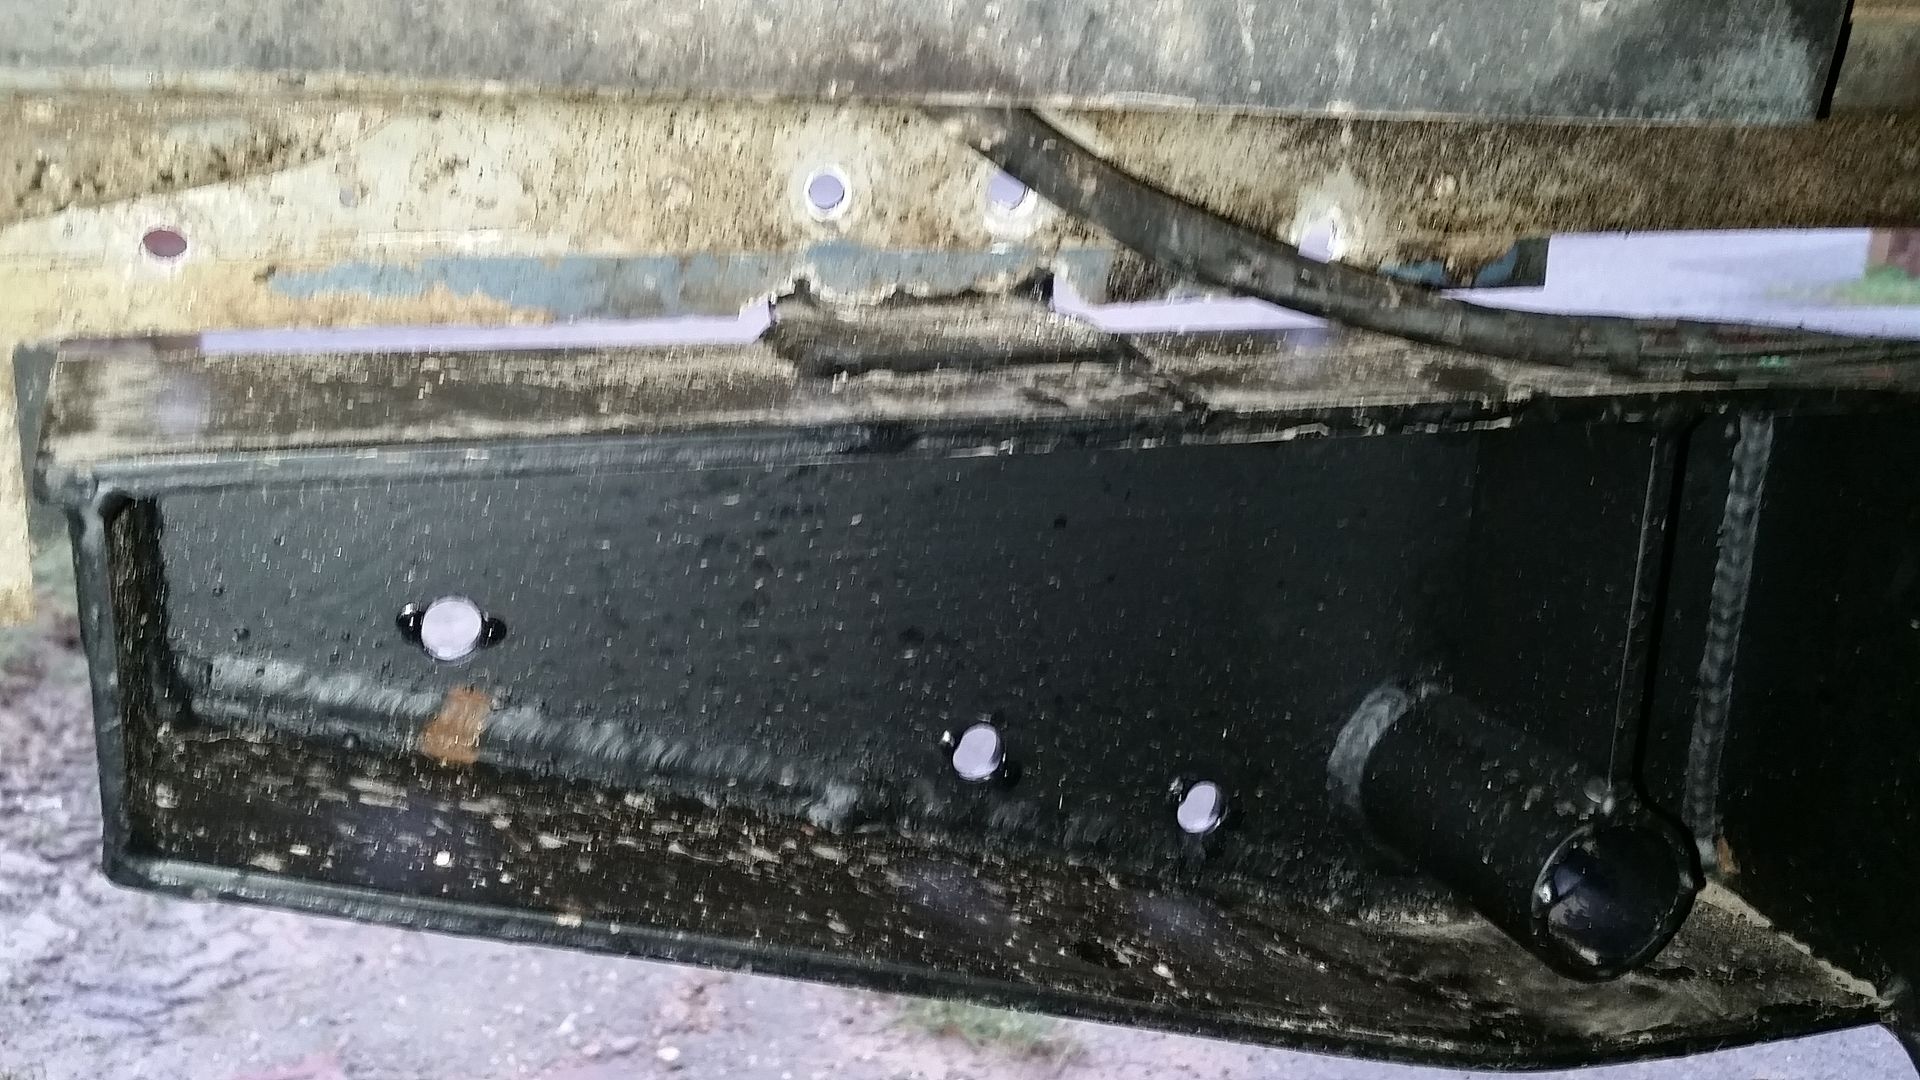
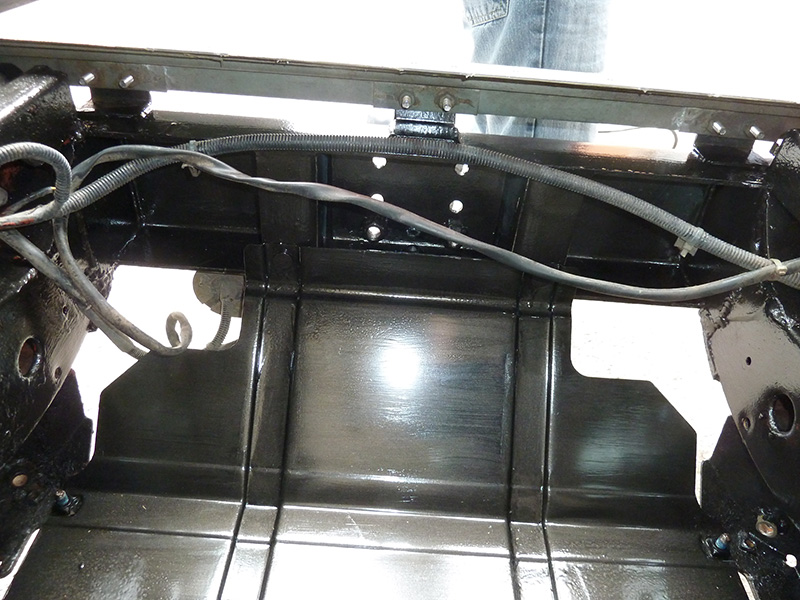
On the Saturday morning I dropped the 90 off at his workshop, Clive showed me the cross member and fitting kit he had made. Being 6mm thick, it’s a sturdy thing of beauty.
Sunday lunchtime I got a phone call, the 90 was ready.
I went to collect the 90 and was met with a greatly improved rear end. Clive explained that the loom for the rear lights had become brittle and some of the wires had snapped when he had moved it up out of the way. He fixed it but didn’t want any money for this work but I insisted in paying him extra. He went on to say he had had some problems spraying the new metal work due to the cold clogging his spray gun. It looks fine to me.
Anyway enough rambling. I have no financial interest in Clive but I do believe that great service and workmanship should be rewarded by being spoken about.
Clive can be found at the above site or on Facebook.
He’s moved workshop but doesn’t advertise its location for security. It’s probably best to contact him via email first off, he has two mobiles, one on Facebook and the other on his website. That’s because one works at home but not at his workshop and the other works at his workshop but not at home…
For some reason I can't add pictures, I will keep trying.
If you require pics of the work, I can email them to you...
Any questions don’t hesitate to ask… John
-
Aren't Land Rover bound to supply parts for up to 5 years after end of production?
The guy on the factory tour said that LR were going to supply parts for 10 years...
If that's the case you should still be able to get new chassis...
-
1
-
-
Could you put plastic ducting in the air box in the dash panel and fill the rest with insulation?
I'm sure I read that someone had done that,may have even been earlier in this thread...
-
I can't remember the exact figures from a pre Christmas factor visit but it's takes something like 300 staff to make 500 Defenders and a 150 to make 1000 Range Rovers in the same period...
-
I was at the Ford plant at Dagenham a good few years ago. Talking to some of the staff, they said if a car came off the production line with a fault it would be crushed straight away. They didn't even take off the new wheels and tyres or remove the stereo. The guys said it would be crushed even if it was a very minor fault, it was cheaper to build a new car than fault find...
-
Brilliant. I shall order a new cable and get on with it.
Thanks. John
-
There was a write up in LRO I think it was, a couple of years ago. Someone put aTDV8 into a 90. The company that did the wiring/ecu was BEL. Can't remember what the letters stand for but they still advertise in LRO. The cost was in the 5 to 6K range all in. They fitted a Disco 6 speed manual gearbox as it was so much work to try and get the auto box to work without the rest of the loom etc...
That would be my first choice of motor with an auto box in my 90....
John
-
The problem is back....
I now know what the problem is though.
The outer cable(sheath) has broken just behind the fitting that attaches to the back of the gear selector housing. Every time I move the selector the sheath moves. This means that the selector does not match the lettering on the surround and it changes position every time I move the selector. Currently reverse is where park should be and drive is where neutral is....
So now I am hoping someone can tell me where to find the instructions to replace the cable... or tell me how it connects/ disconnects from the selector/hoousing...
Thanks John..
-
The wife asked if it had been designed by Lego....
-
1
-
-
With the money you would have saved buying on line, you could have bought a chain and padlock....
-
Done.... Thanks..
-
I'll crawl under it tomorrow and have a look.... it would save pulling out the center console... Thanks...
-
It's an HP22 as far as I know. If I push the lever as far forward as possible on a slope I can hear a noiseas the car moves. To me it sounds like a cog trying to engage with an other cog nut only just touching....
I'll go and see if I can see how it adjusts. It's got a 50th Ann center console, which I think I am going to have to remove before I can do/see anything...
Thanks, at least I know where to start looking....


![]http://s163.photobucket.com/user/landrovermanuk/media/Mobile%20Uploads/20160131_161628.jpg.html]](http://s163.photobucket.com/user/landrovermanuk/media/Mobile%20Uploads/20160131_161628.jpg.html)
Faulty temperature gauge.
in Defender Forum (1983 - 2016)
Posted
So the 90 has according to the gauge been running hot for the last few weeks, just under the red.
Tuesday, the gauge goes to the top of the red, so let the 90 cool, turn the ignition on and the gauge goes to the top of the red.
Unplug the temp sender and the gauge still goes straight to red.
Not being an electrical genius, I am surmising a faulty gauge.
Now unless I have missed something, it's time to order a new gauge.
Now do I go for an original or something after market that has the temp in numbers rather than white and red?
Do I order a new sender, just to be safe?
Any answers suggestions welcome.
The 90 is like triggers broom.
1993 200tdi model with a 1994 Discovery 3.9efi with auto box.
New radiator with twin electric fans, which didn't come on but I know are working.