


PaulMc
-
Posts
937 -
Joined
-
Last visited
-
Days Won
4
Content Type
Profiles
Forums
Events
Gallery
Blogs
Posts posted by PaulMc
-
-
The connector pictured in your first post, is a Bosch Jetronic connector, similar to the connectors in their commercial Jetronic range, but made for Volvo in a custom colour (grey).
The connector, terminals and seals are available from Volvo, under the following part numbers -
Housing = 979041
Terminals = 978261 (0.5 - 1.0mm²)
Seals = 970772
The terminals and seals are standard TE (AMP) Junior Power Timer 2.8mm, which are available from many sources, including me

.
-
 3
3
-
-
What's it for?
Could you post some more pictures of it, from the front and rear.
As said above, it looks like a Junior Timer / Junior Power Timer variant.
But there are other makes that are similar, some interchangeable, some not.
.
-
2 minutes ago, daveturnbull said:
If I were you I'd break the melted bit open, just to find out what size fuse it has it in, then snip it off and fit a new fuse holder and fuse with some freshly crimped terminals. It looks like you should just have enough wire there.
You beat me to it

.
-
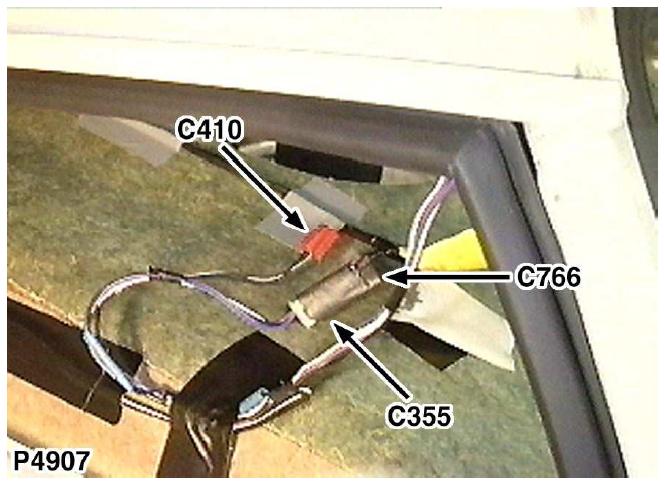
daveturnbull has nailed it - it's a fuse holder.
From your additional pictures, I can see that the two brown wires are crimped into the same terminal.
Looking at the gauge of those wires, plus the wire colours, I would hazard a guess that this fuse holder was installed as part of the SA build.
That fuse carrier needs replacing completely.
Prise it open to see what the value of the fuse is, and depending on the fuse value, consider replacing it with a 'Maxi Fuse' carrier, which has larger terminals.
.
-
Are you sure that it's a connector?
It may be the resistor for your blower motor.
The only wiring details for the SA 2.8 Defender, are to do with the additional wiring for the BMW engine, the rest of the vehicle is supposed to be the same as the 300Tdi on pre-1998 models, and the TD5 on 1999 models onwards.
Could you post a few more pictures of it, from different angles, showing any moulded-in writing, part numbers, logos, etc...
.
-
Another one that I'm always being asked for.
The connectors in this series are made exclusively for BMW by TE Connectivity (AMP), and aren't available commercially (except to Jaguar/Land Rover and a few other manufacturers).
However - a 'zero coded' (universally keyed) version can be bought from a BMW dealer -

The BMW part number for the female connector, is - 61 13 8 367 076
BMW's zero coded connectors are 'Water Blue' to denote that they are universally keyed
Female terminals and seals have to bought separately (picture from BMW parts listing) -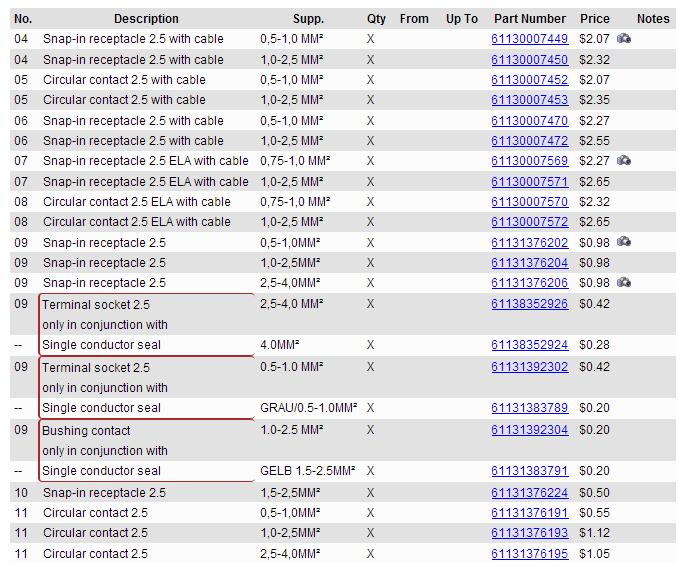
2.5 - 4.0mm² cable
Female terminal = 61 13 8 352 926
Seal = 61 13 8 352 924
1.0 - 2.5mm² cableFemale terminal = 61 13 1 392 304
Seal = 61 13 1 383 791
0.5 - 1.0mm² cable
Female terminal = 61 13 1 392 302
Seal = 61 13 1 383 789
.
-
I get asked for these all the time.
The glow plug connectors are not available from Land Rover, except as part of the complete engine harness.
I’ve looked for a supplier – but, it’s not clear who actually makes them for Leoni Wiring Systems (Land Rover’s harness manufacturer).
However, I’ve been reliably informed that the same connector is used on some VAG (VolksWagen, Audi, Seat, Skoda) vehicles, and is available from a VAG Dealer, as part number 028971782A

In the Defender / Discovery-2 engine harnesses, the other ends from the glow plugs, are all crimped together to the yellow/black feed wire from the glow plug relay, and sleeved over..
-
6 hours ago, Ed Poore said:
Paging @PaulMc
As said, they're TE Connectivity/AMP (not Amphenol - they're a different company) 070 Multilock connectors.
The terminals don't look that bad, - that's just a bit of mild corrosion caused by dampness.
A soak in vinegar will remove that corrosion, followed by a good rinse in de-ionised water, and a thorough drying-out.
Use Silicon contact grease on the terminals to keep the corrosion at bay.
.
-
You need a Sumitomo HW090 2-way female connector to mate with the male connector in your pictures.
I can supply these, complete with terminals and wire seals.
.
-
1
-
-
The Puma heated seat switch is wired as follows -
Pin 1 - live in
Pin 2 - live from dash illumination
Pin 3 - not used
Pin 4 - live out to relay
Pin 5 - to earth
.
-
The D2 spotlight switch is a non-latching (momentary) earth-switching switch, intended to switch the D2's spotlight electronic control unit.
As such, it's wired as follows -
Pin 1 - from ECU
Pin 2 - from dash illumination
Pin 3 - not used
Pin 4 - to earth
Pin 5 - live from spotlights (to illuminate the switch's tell-tale LED)
To achieve what you want, you will need to use a latching live-switching switch, such as the Defender Puma heated seat switch, and swap the switch front for the D2 spotlight switch front.
.
-
2 hours ago, Turbocharger said:
Thanks for the plug info, much appreciated 👍 Any idea on these plugs, the electric window switches in a 2002 Defender dash (and a Disco 1 centre console, and late RR Classic - and let's be honest, probably a Metro or Marina too). They look like an elegant way to get inputs that will be glove-appropriate.

The connector keyways on that switch, tell me that it's a rear electric window switch for a Discovery-2 and a Freelander-1
It uses a Purple 6-way connector.
I have these.
.
-
On 5/29/2020 at 9:58 AM, Karel said:
Do you ship them to Belgium and what does it cost?
Grtz
I do ship to Belgium, by Royal Mail Airmail, which isn't too expensive.
The headers are £11.95 each, supplied with 20 x terminals.
Additional terminals are £0.28 each.
I only have a few of the grey and blue headers, but larger stocks of the other four colours (green, orange, yellow, black)
.
-
On 3/30/2020 at 6:16 PM, Turbocharger said:
There's several plugs. For each I got the corresponding length off the P38 but that's a limited supply and the wires are old and brittle.
Compressorhas a chunky plug with (I presume) power, ground and something from the pressure sensor to trigger it.

The solenoid box has two plugs (red & purple) and presumably the slave ECU (yellow) which does the PWM magic. I'll be replacing this with MOSFETs controlled by the Arduino.

The purple plug is internal to the box and presumably runs one of the solenoids or a sensor. The red plug would be handy to interface with:

Looks like I was smart enough to get the corresponding bits off the P38 too so should be ok with these until I break either.

The height sensors each have a short tail of old brittle loom so these will be more of a problem in the longer term.

Any ideas for these?
The smaller pinned connectors are Econoseal III 070 series - available everywhere.
The larger pinned connector is an Econoseal III 250 series connector.
Both male and female 250 series 4-way connector kits are available from AutoClick.
Male connector kit -
https://www.auto-click.co.uk/index.php?route=product/product&product_id=785
Female connector kit -
https://www.auto-click.co.uk/index.php?route=product/product&product_id=786
.
-
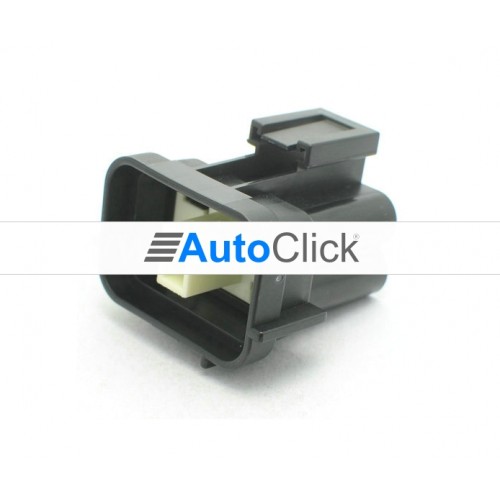
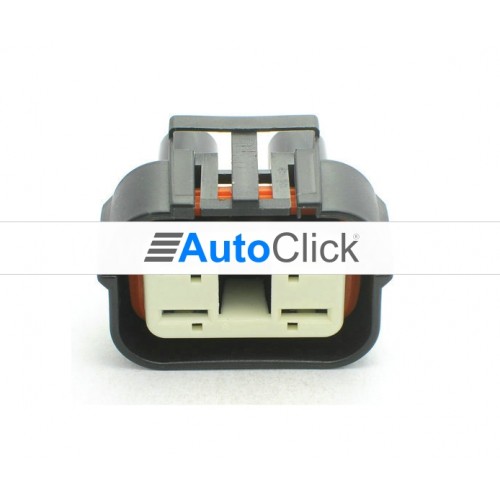
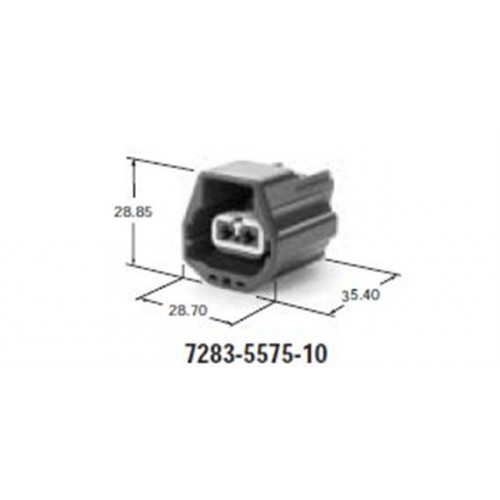
It's a Yazaki YESC 2.8 Sealed System 2-Way Connector -
I'm sure that the female connector is used on D3/D4/RR Sport - but I don't have a LR part number for it.
The male connector is used for the Puma/Tdci Defender heater blower, and is LR part number YPC900890 -

Unfortunately, this for the connector housing only, terminals and seals are not included.
Land Rover sell the terminals and seals pre-crimped to short lengths of 2.5mm² cable, part number 41841118 (418-411-18) -

These cost around £30.00 for a pack of 10
There's some on ebay at the moment, for £22.95 (inc. free UK delivery) -

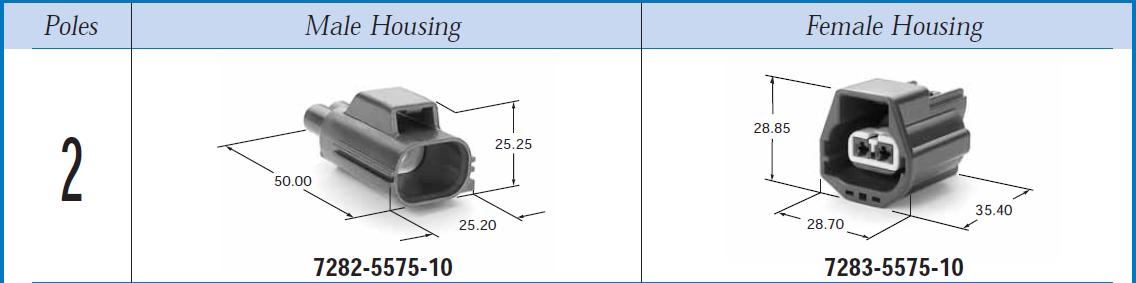
This company sell both the male and female connectors as a kit, including terminals and seals -
Male connector kit -
https://www.auto-click.co.uk/7282-5575-10
Female connector kit -
https://www.auto-click.co.uk/7282-5575-10
I've not bought anything from AutoClick , so I don't know if they're selling genuine Yazaki connectors.
But, their prices are lower than I can get genuine Yakazi for - so, they're either buying in massive quantities, or from our friends in China

.
-
I separated the interior lights and instrument back-lights from the single on-off-on switch by my right knee, into 2 x separate switches.
The interior lights are now on a switch on the centre panel on the dash, and the instrument back-lights are now on their own switch in this position under the clocks.
.
-
1
-
-
The Bearmach switches that MUD sell, are based on the Land Rover switch YUG000540LNF
This switch switches a relay's coil to earth - they don't make this too clear.
They nicked my diagram for YUG000540LNF for their instructions - here's one I've modified to be specific for rear work lamps that work how you want them to -

The wire colours shown for - Dash illumination (RO), Reversing lights (GN), Permanent live (PN), and Earth (B) are as found on the vehicle.
.
-
Don't connect the WG wire to anything.
It's an ignition switched live used by the TD5'S Denso alternator.
It's not required on the P38 alternator.
-
1
-
-
The Defender 300Tdi under-bonnet fuse box doesn't compare to the TD5 underseat fuse box, as you've discovered.
The TD5 underseat fuse box is based on the engine compartment fuse box used in early Freelander-1, and 300Tdi Discovery-1, which are based on the engine compartment fuse boxes fitted to Rover 200, Rover 400, MGF and MG TF cars.
They all have the same Sumitomo connections, but I don't know if they all have the same functionality.
The Freelander-1 and MGF use the same fuse box - YPP100310L in the Freelander, and YPP100310 in the MGF - the MGF version is cheaper.
Rimmer Brothers currently have an MGF version - YQE000400 on sale for £10.00 + VAT
https://rimmerbros.com/Item--i-YQE000400
I'm sure that you could make it work with a Defender for that price.

The Rover 200 has a front mounting bracket for this type of fuse box - callout 7 in the diagram below -
This bracket is now unavailable from Rover - but, I've got a few brand new ones kicking around somewhere.
.
-
I've always used 'Galvafroid' paint to cover the cut surface on Galvanised metalwork, such as conduit, trunking, tray work, etc...
-
YWY000080 was also fitted to Rover 75 / MG ZT cars.
-
Not on eBay.
-
2 hours ago, Mo Murphy said:
Dave, Paul Mac has the TD5 type headers in various sizes and configurations.
Mo
et voilà

BLACK

Sub-divided into five circuits -

BLUE
Sub-divided into four circuits -

GREEN
Sub-divided into four circuits -

GREY
Sub-divided into three circuits -

ORANGE
Sub-divided into six circuits -

YELLOW
Sub-divided into five circuits -

Supplied (as pictured above) with a 20-Way Splice Connector, Splice Cap and 20 x Sumitomo 090 Terminals.
They are £11.95 each + Postage
.
-
2
-
-
The terminals you've pictured, are Sumitomo 090 unsealed terminals to fit the the HM090 and HD090 series of connectors.
As Peaklander said, they are for interior light and alarm interior sensor, and should be located behind the headlining, at the top of the driver's side A pillar -
The 300Tdi (and 1999MY TD5) used a 'Natural' 4-way HM090 connector for the interior lights, and a Red 3-way HM090 connector for the alarm's interior sensor.
The 2002MY TD5 combined these circuits into one Light Grey 10-way HD090 connector, along with the central locking circuits for the tail door.


Plug
in Defender Forum (1983 - 2016)
Posted
The 'Thor' V8 (D2 and late RR P38) uses similar Bosch Jetronic connectors (with detail differences and different keyways)
The V8 injector connectors are YPC114900 (BMW 12521427615), and look like this -
The Volvo connector looks like this -
Aside from the differences in the body styles (position of boot retainer, bottom of connector and the height of the release clip), they are essentially the same connector.
The only thing stopping you using V8 connectors on your fog lamps, is the keying along the top of the connector.
The injector connector is Code I
The Volvo connector is Code II
If you trimmed-off the keyway lugs on your fog lamp's male connector, the injector connector should connect to it.
.